")
As per usual, this project was inspired by me trying to save money, and deciding to just make it myself. So when I decided I wanted a kitchen play set for my kids, you bet I started figuring out how I could build my own.
In fact , I was actually inspired by a set that I saw on the Pottery Barn website, so this is essentially a DIY Pottery Barn dupe!
In this post I’m sharing the overview of the process, but if you want my full detailed cut list and step by step instructions, you can download those for free here.
What You Will Need:
Materials:
- 1″ Screws
- Glue
- Mini Hinges
- Small Faucet
Lumber:
- (2) 4′ x 8′ ½ plywood
- (1) 4″ x 8′ ¼ plywood
- (1) 2″ round dowel ( 4″ total length )
- (1) 1.25″ round dowel (4″ total length )
- (1) 1″ square dowel (48″ total length )
Optional:
- Mending Plates
- Plywood Edge Banding
- Plexie Glass
- Picture Frame Turn Fasteners
- Drawer Pulls
You can find the links to everything I used linked here.
HOT TIP: I highly recommend cutting all of your pieces for each “appliance” before beginning your build. This will make it so much easier because then you will have everything you need as you assemble. Again you can find my exact cut list in my FREE DOWNLOADABLE PLAN SET!
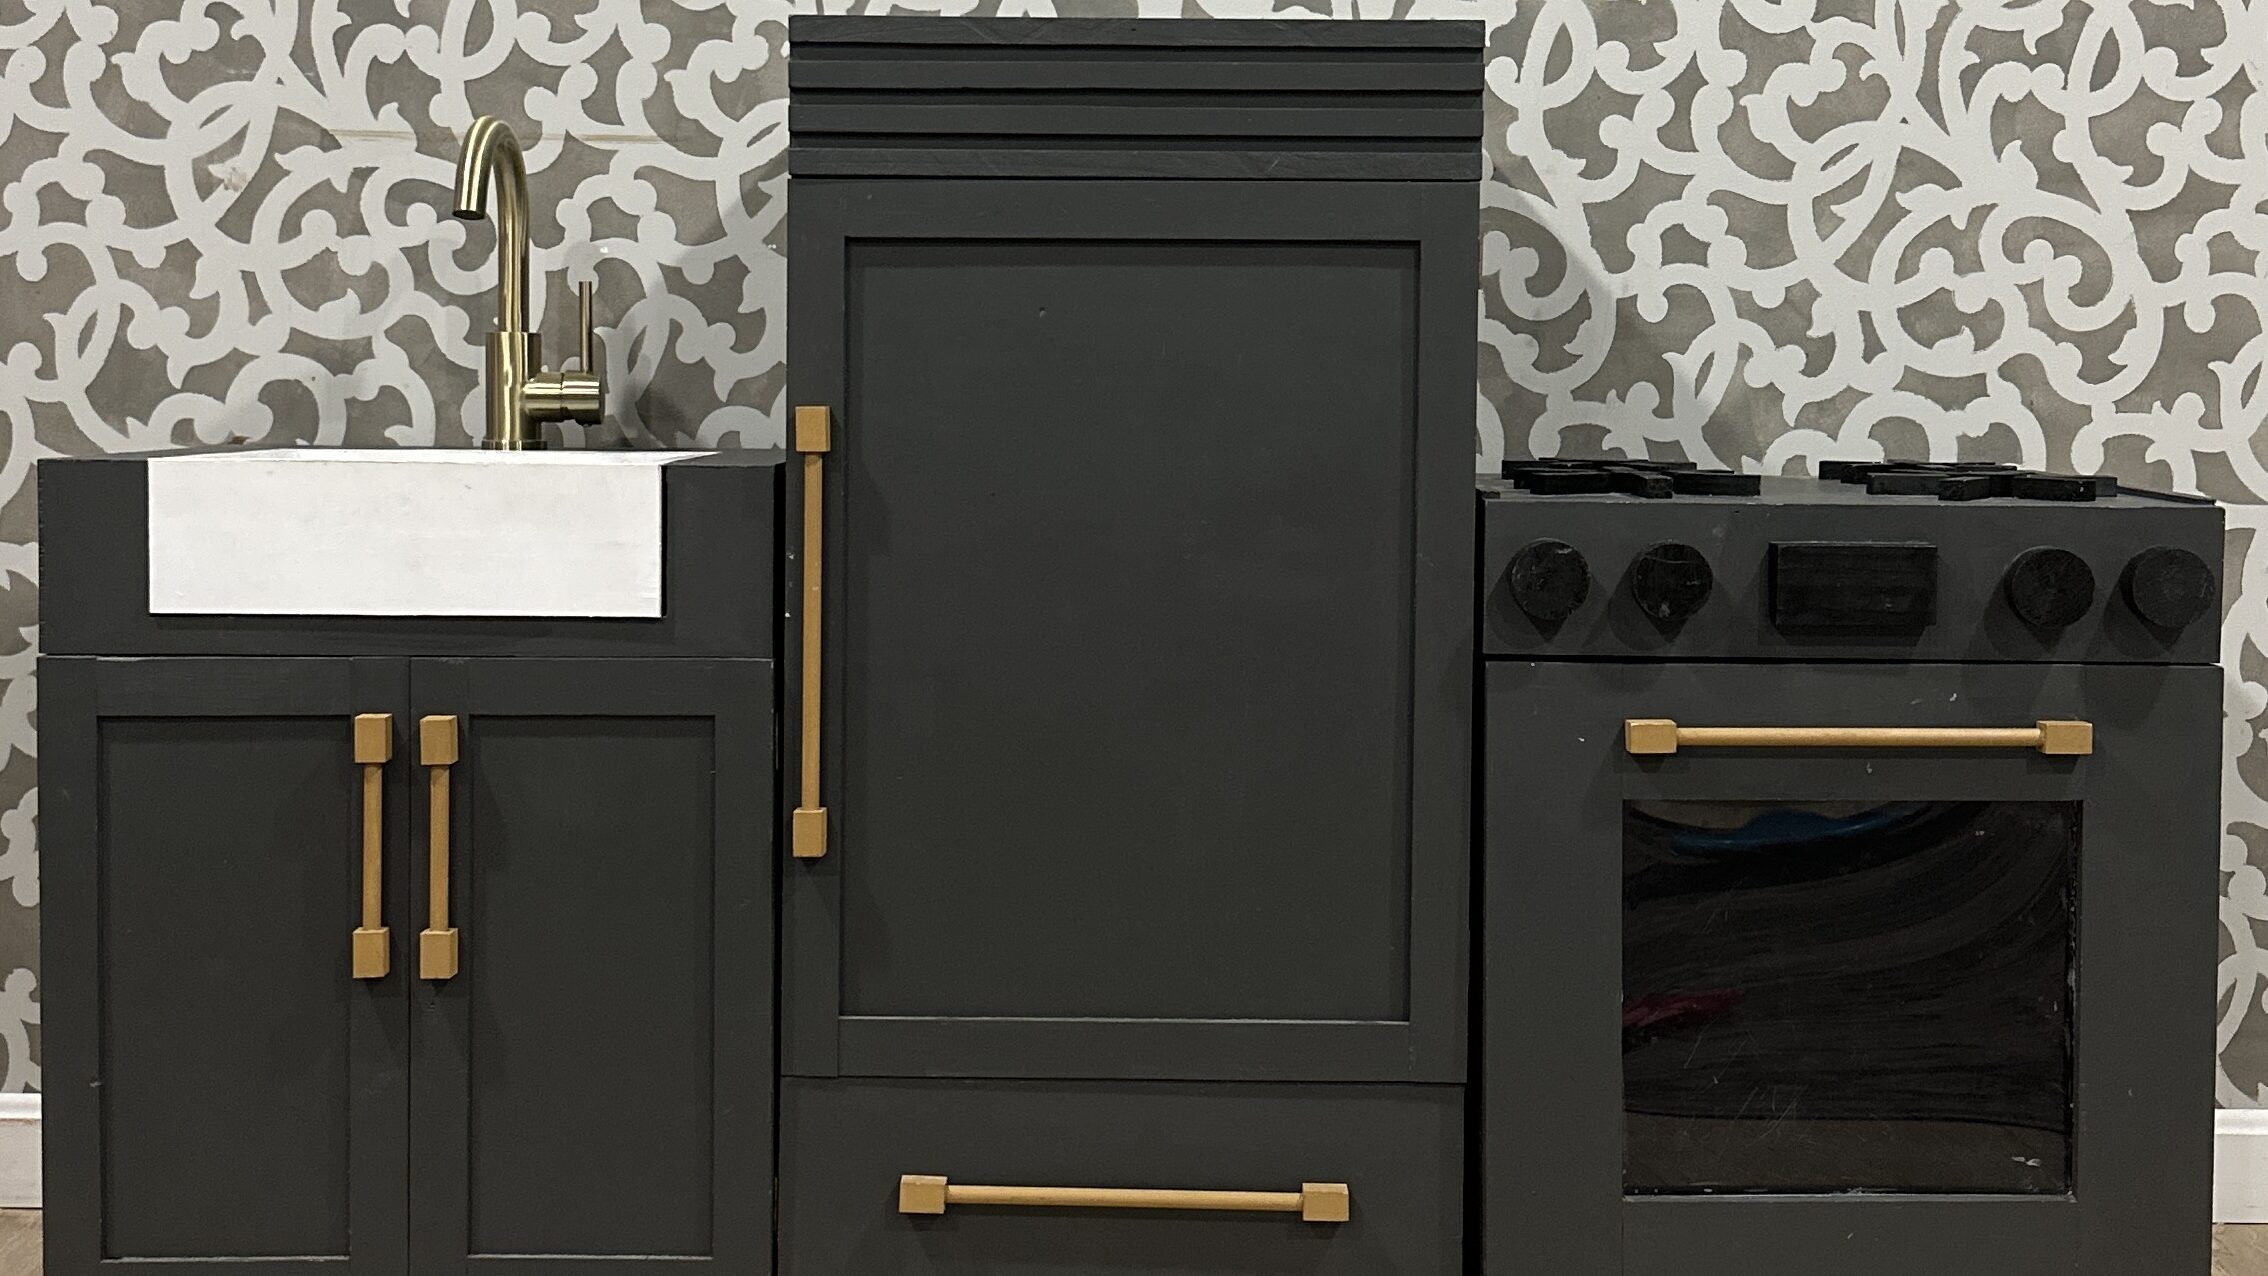
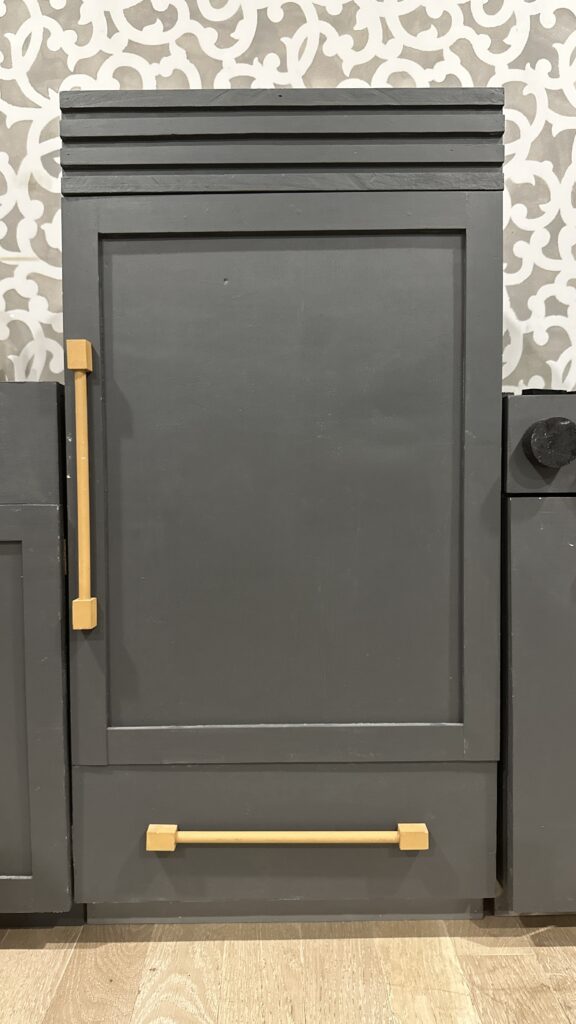
Kitchen Play Set – Refrigerator
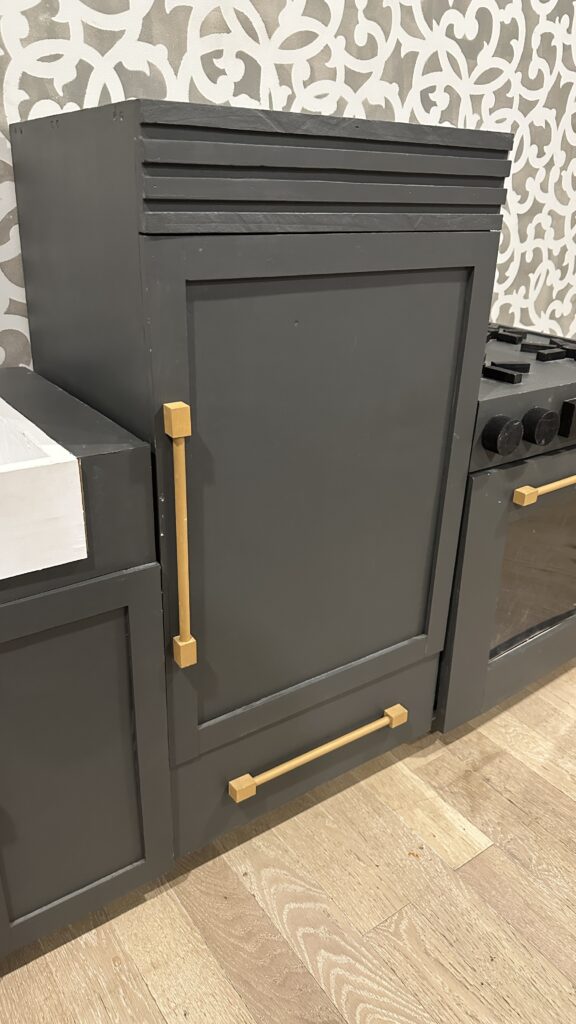
I started by attaching the top and bottom panels in between the side panels to create my overall refrigerator box.
Then I attached the vent base to the top before evenly spacing and attaching all the little ventilation pieces on top.
Next I moved onto the refrigerator drawer. I started with the back and sides pieces, making sure the sides sat in between. For the front, I figured out that it needed to be larger than the back piece since it would be the drawer front too! So the front needed about a 1” overlap all around. To attach it all together, I used a combination of wood glue and a nail gun , but you could use either or you could also use screws. It’s whatever you prefer!
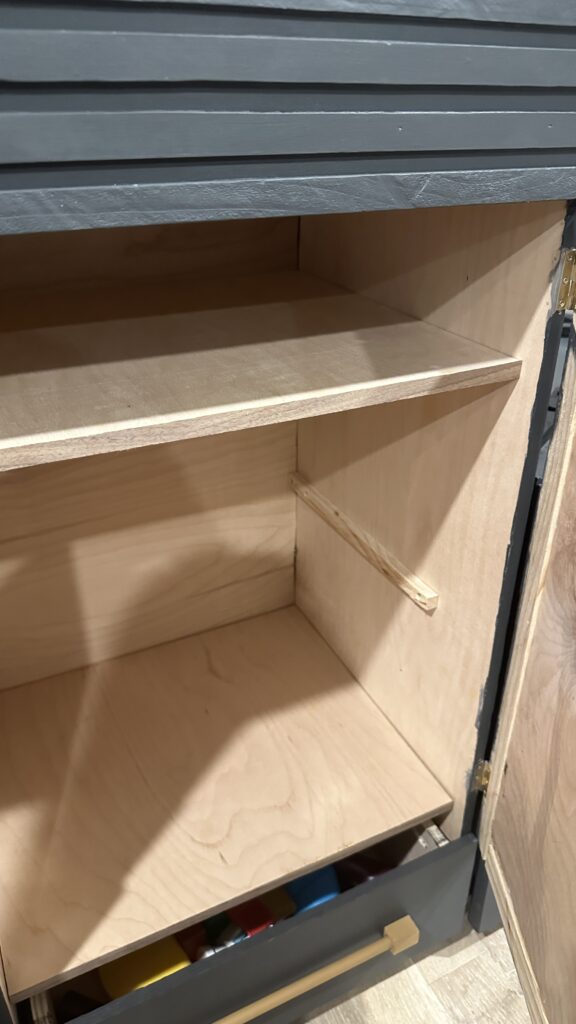
To make the fridge feel more legit, I added drawer slides and I also added shelves inside the fridge before adding the door with miniature hinges.
And once I got all of that complete, I finally attached the back panel and I had a little kids play refrigerator for my kids kitchen play set!
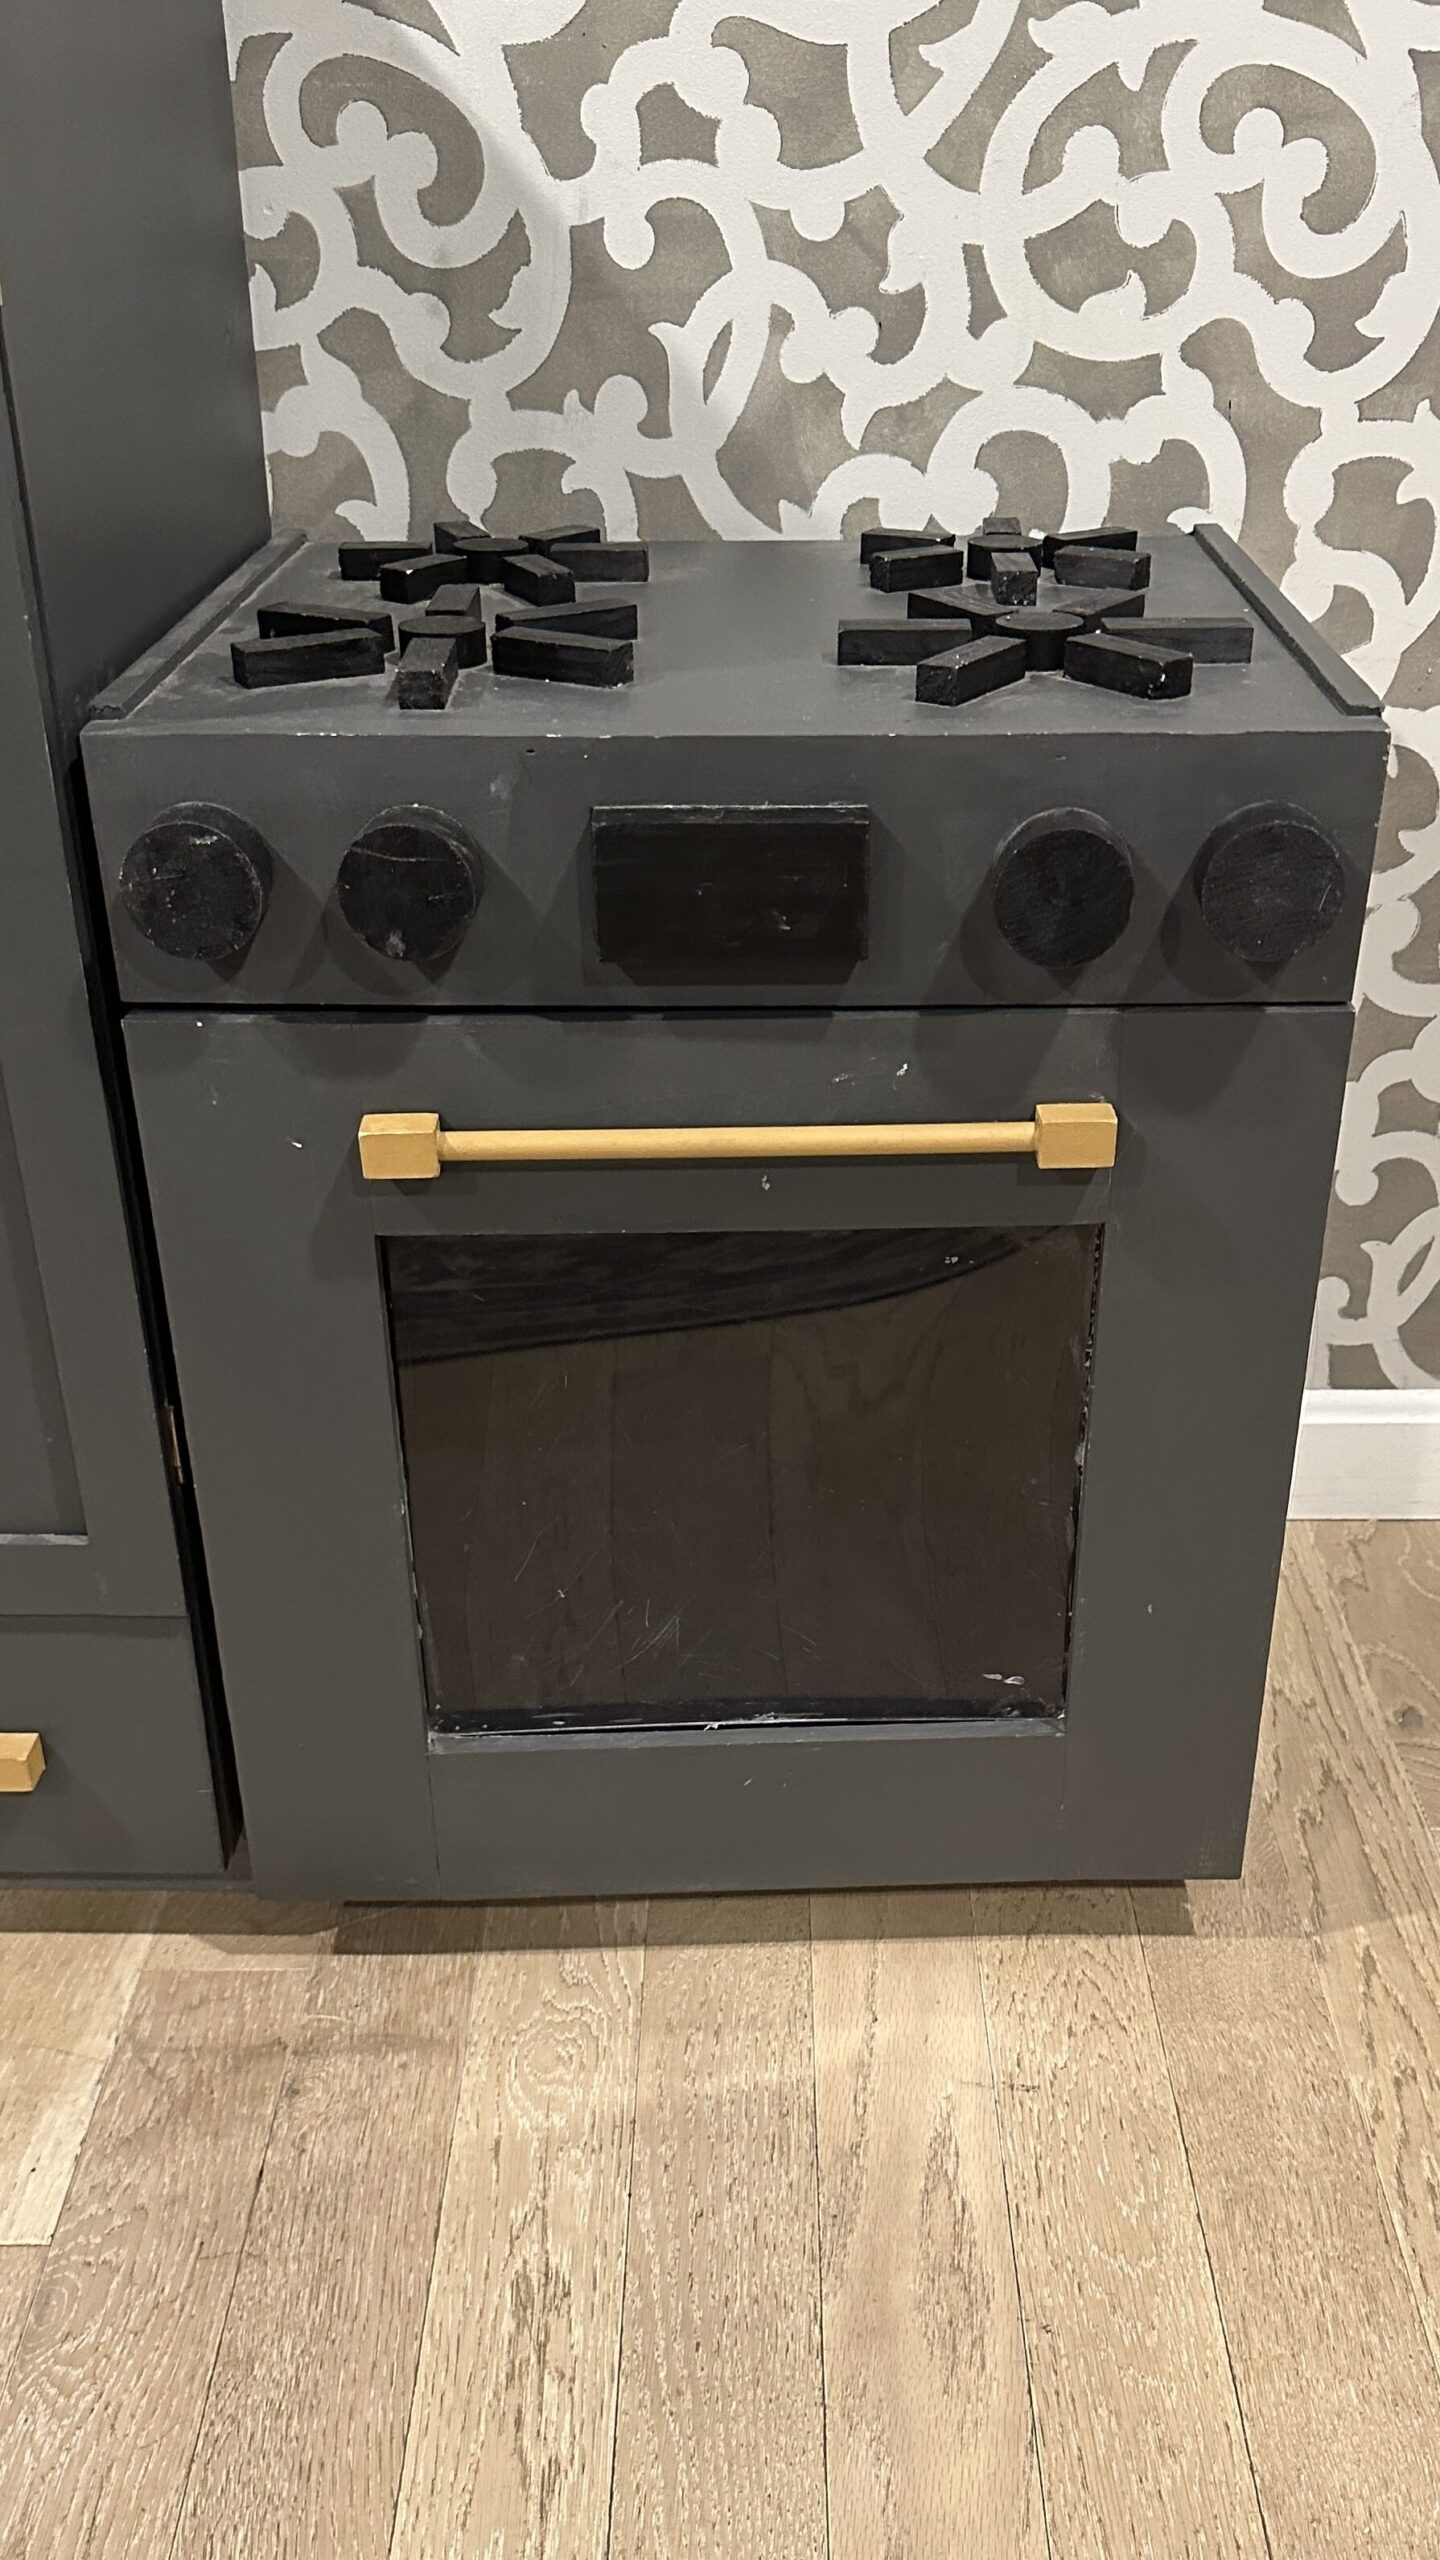
Kitchen Play Set – Oven
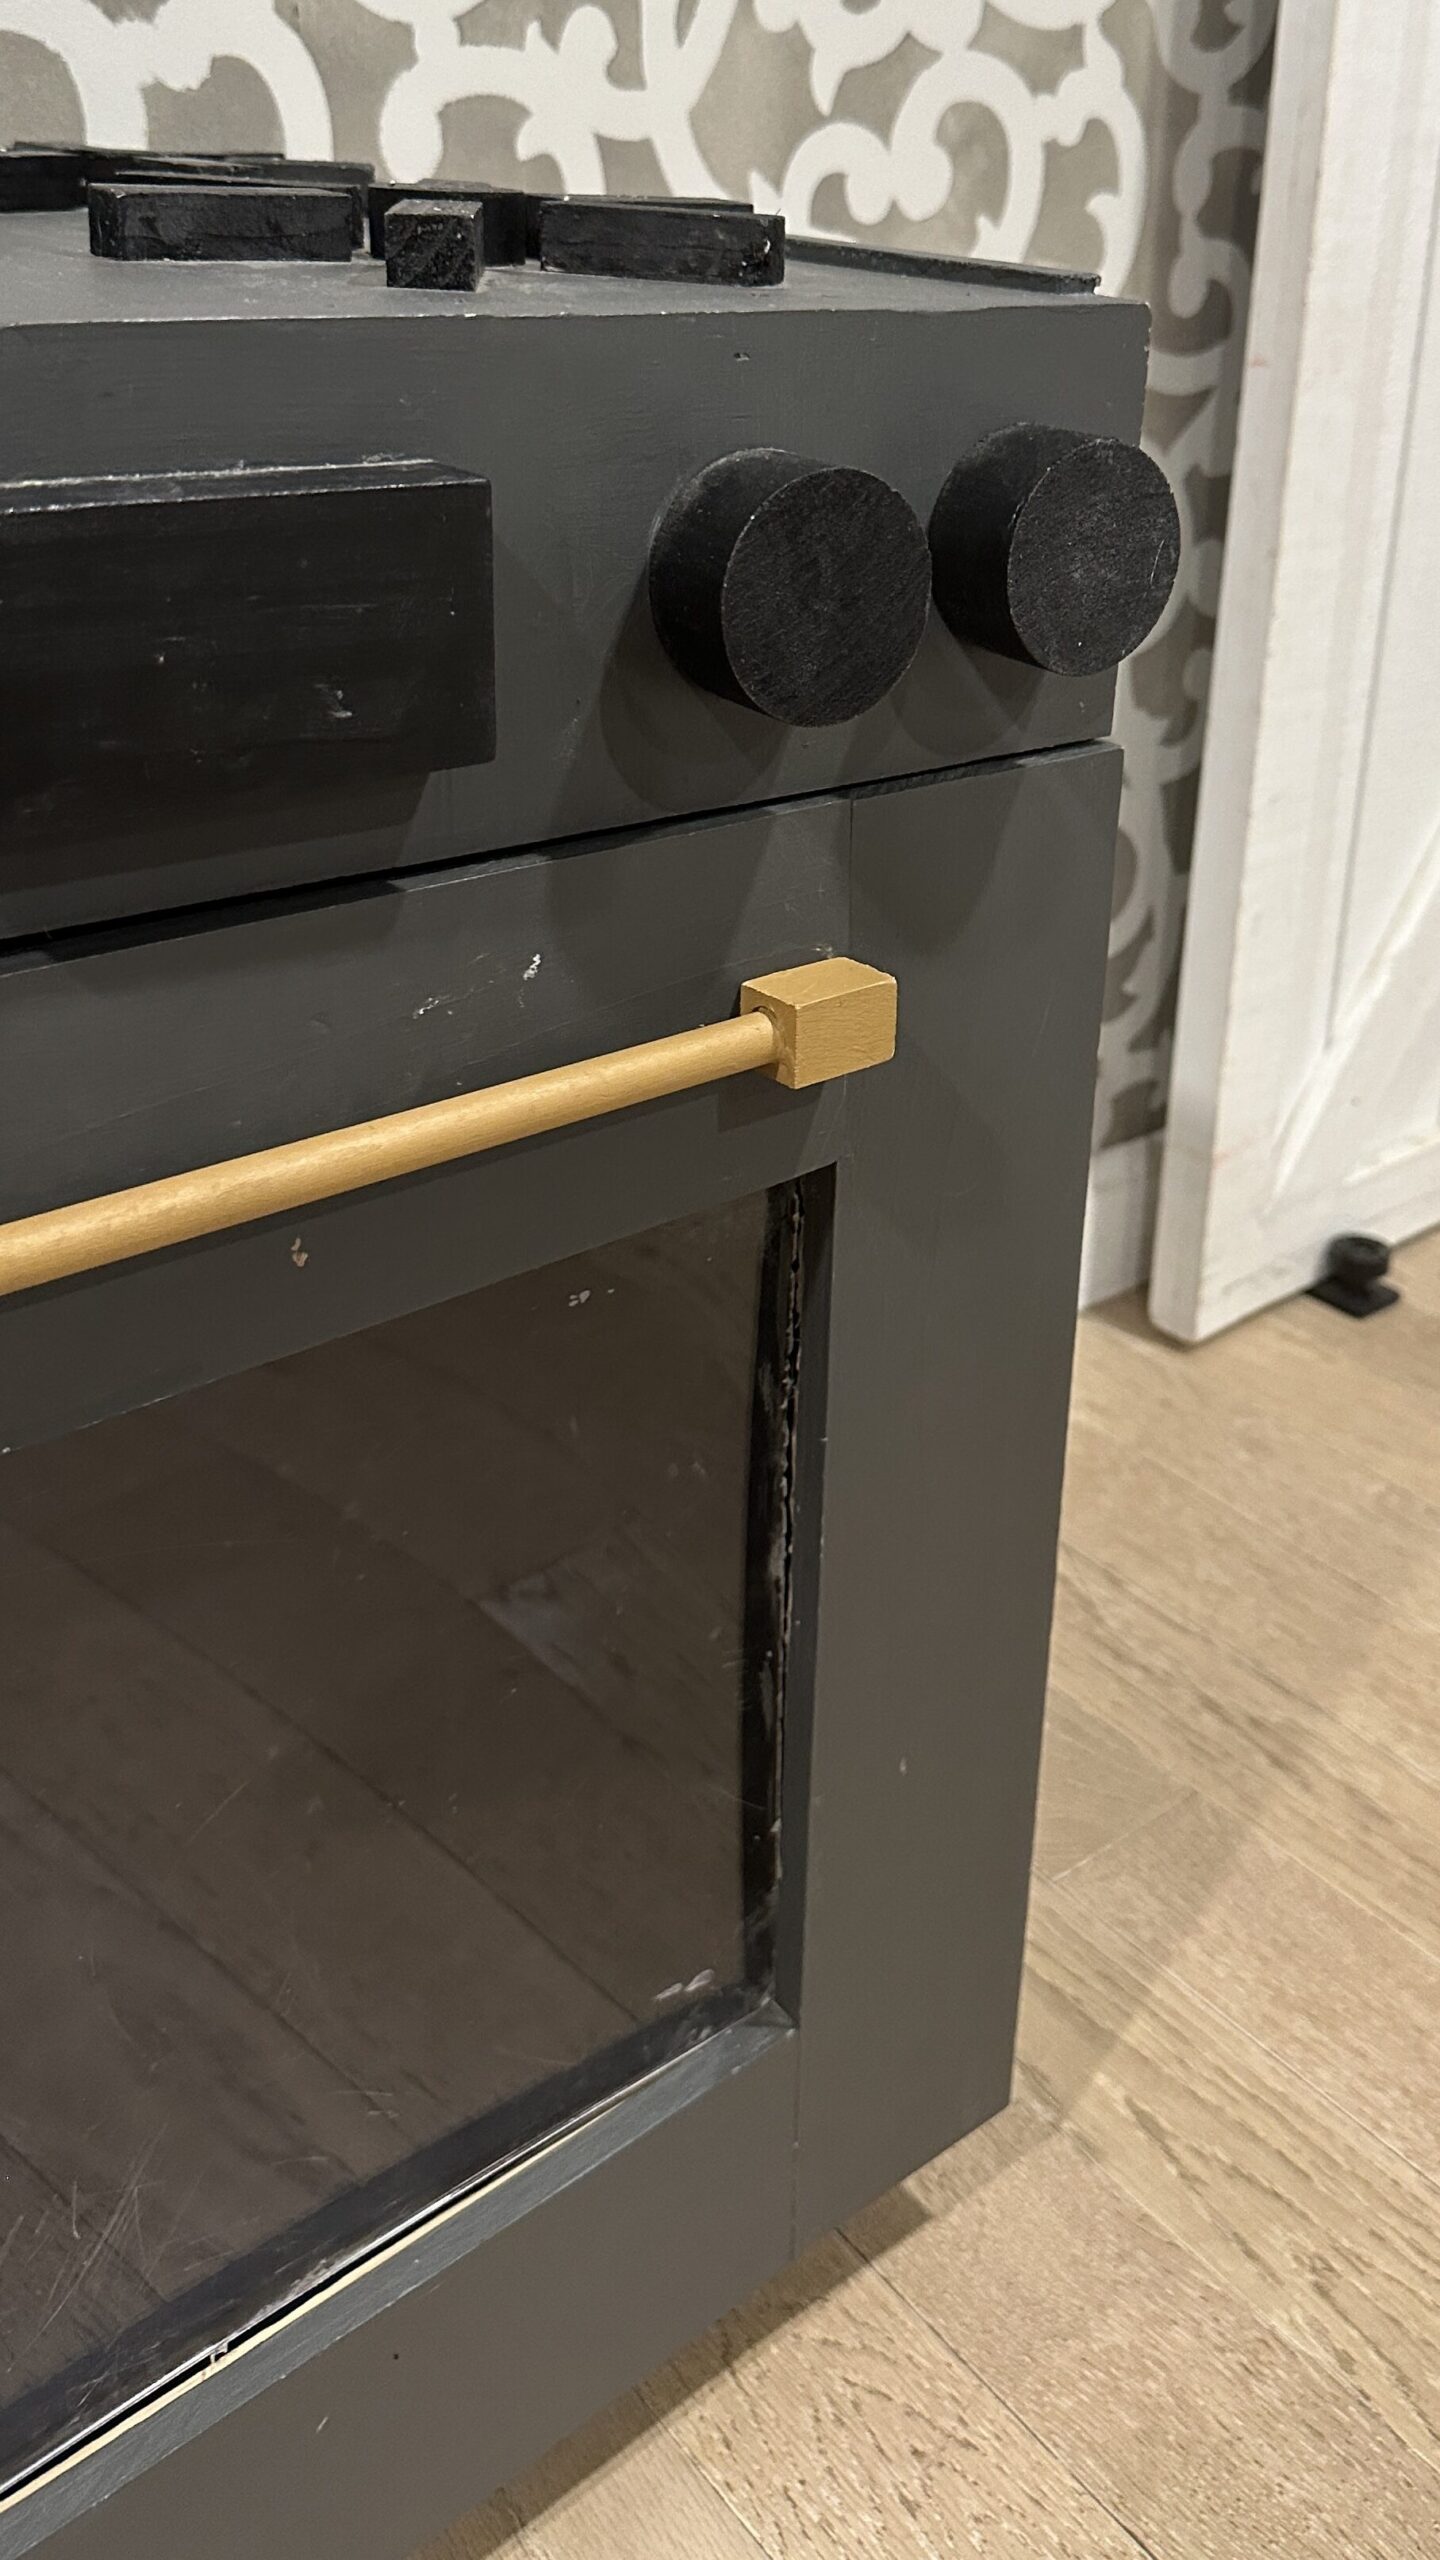

Next I moved onto the oven. Again, I attached the top and bottom panels in between the side panels to create the overall box for the oven.
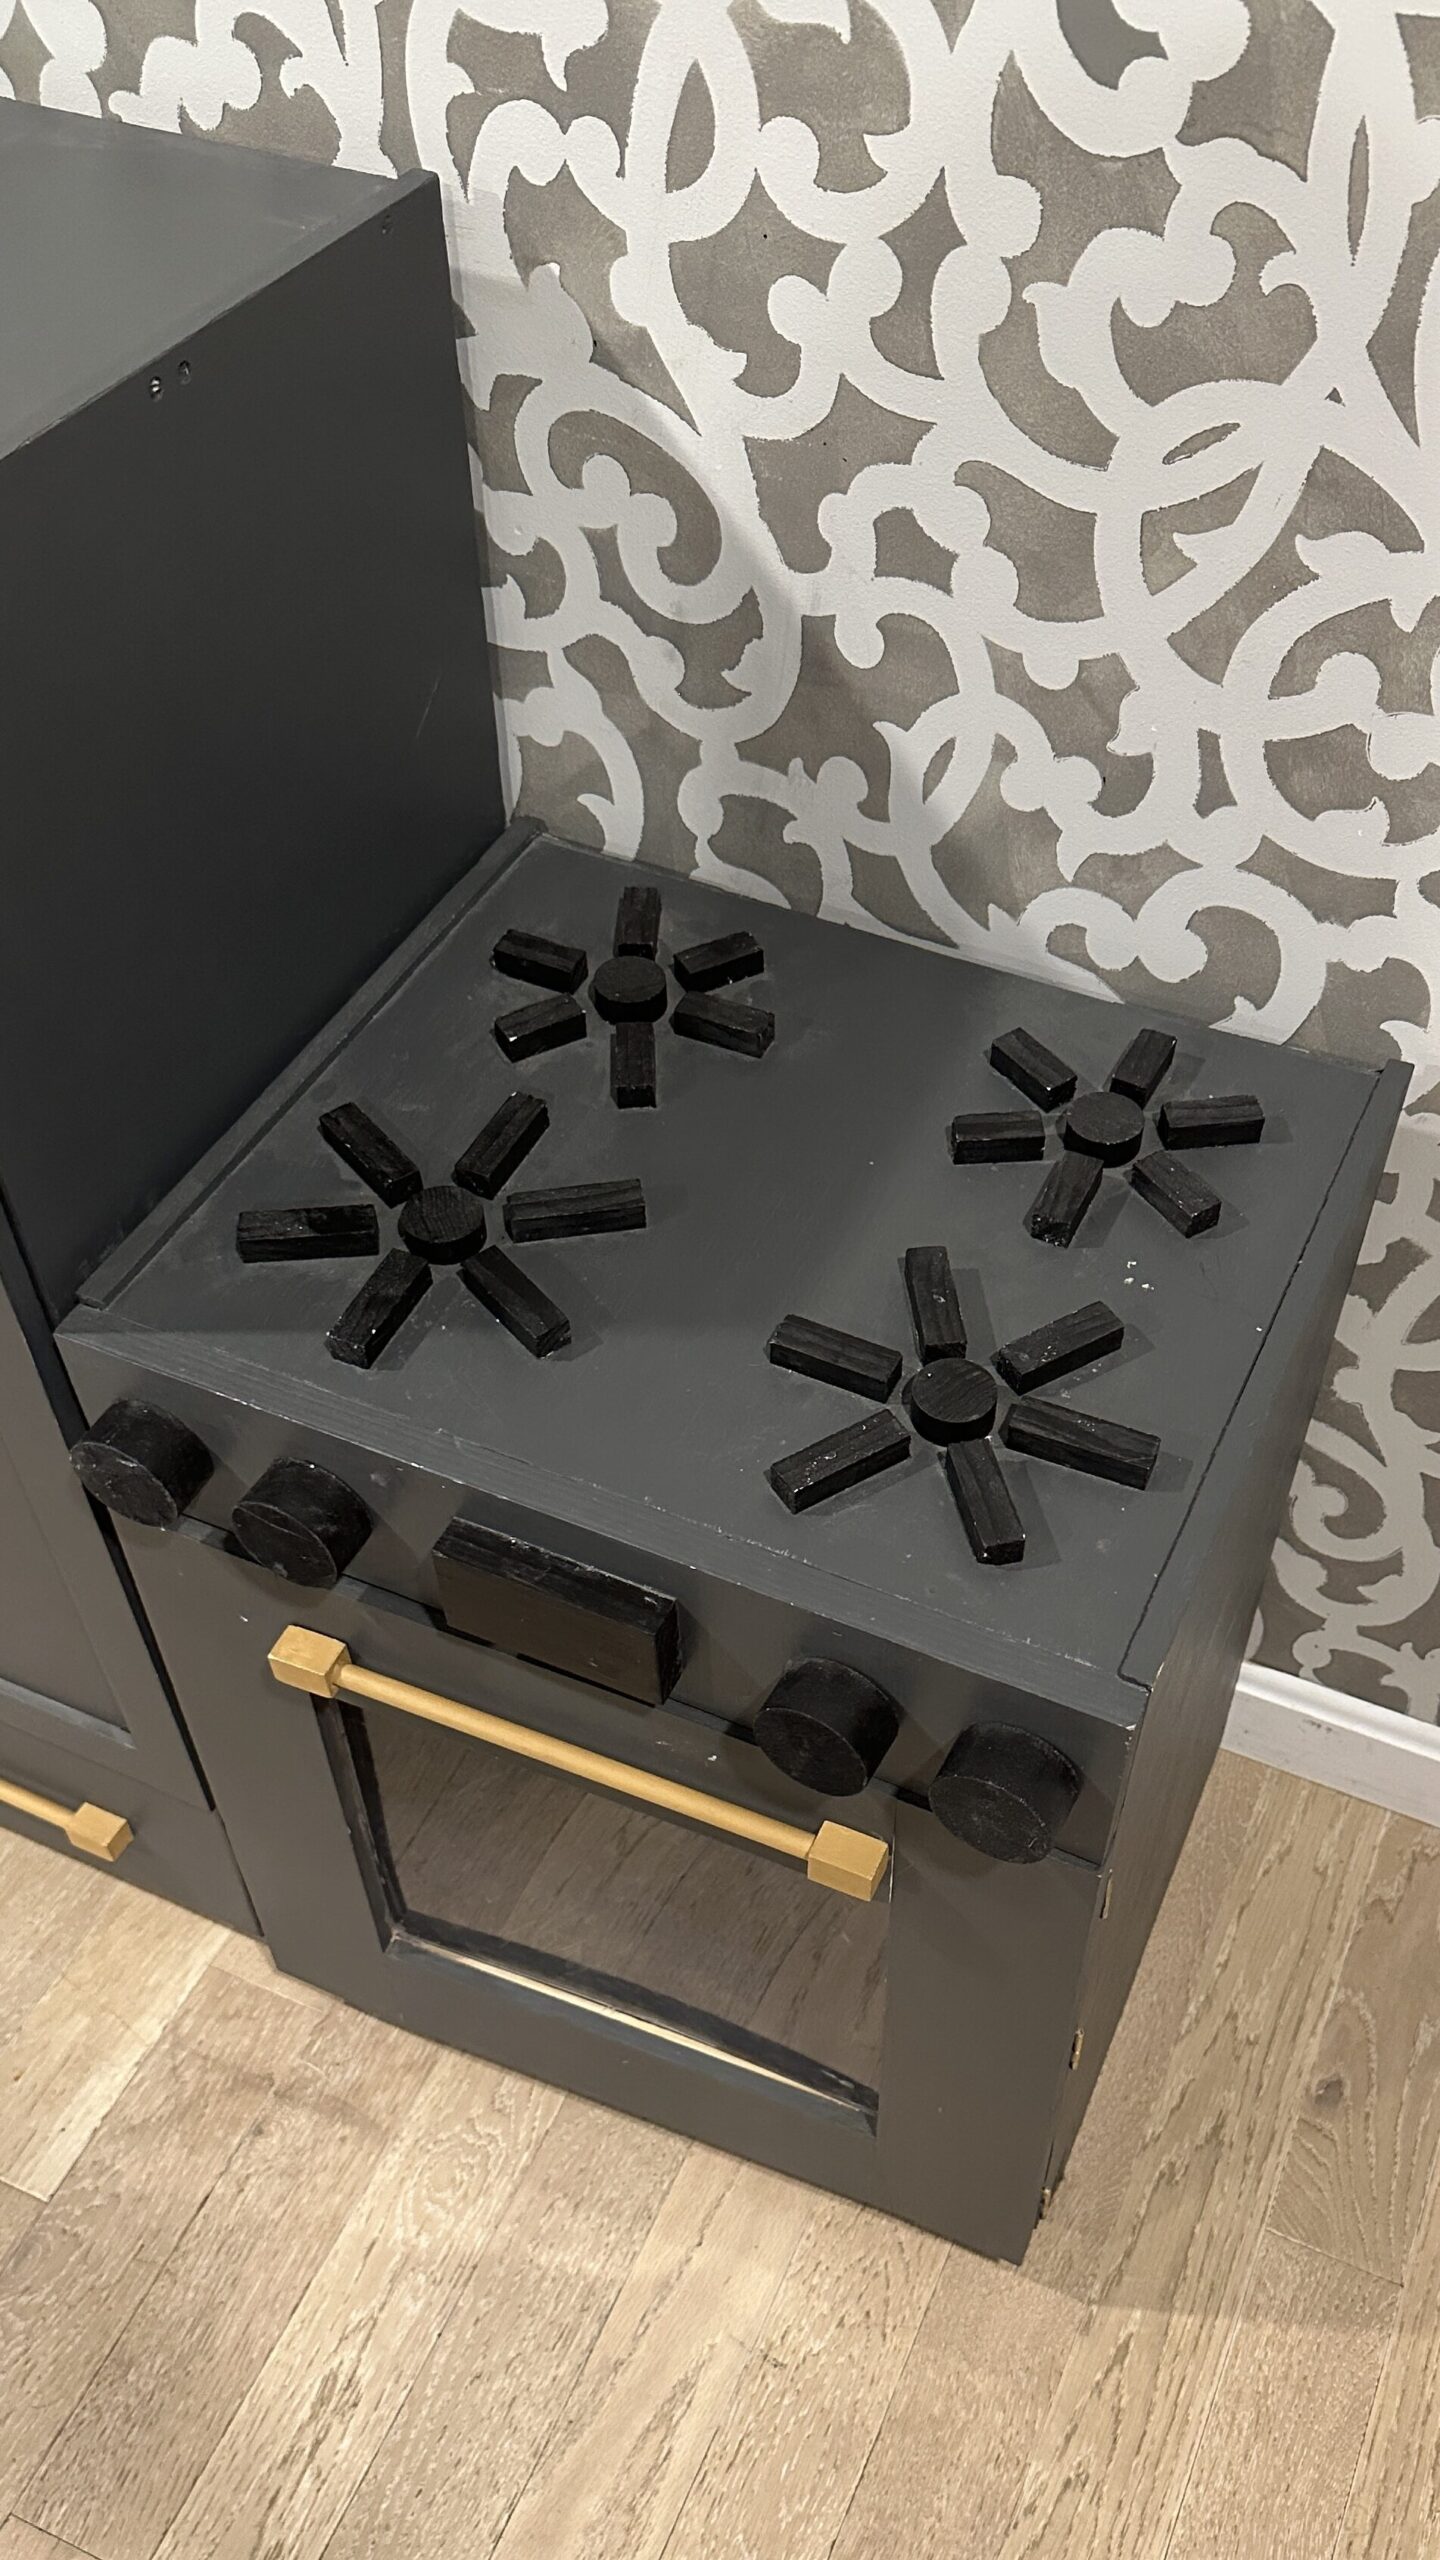
To create a place to attach the control knobs, I added a base strip on the front of the box at the top just like on a real oven! And then I attached the square clock/temp reader piece in the middle of that piece, and evenly spaced the knobs out on each side of that. For the knobs I used screws and a drill instead of glue and nails so that the knobs would actually turn!
For the door, I used pocket hole screws so you couldn’t see them. But if you don’t have a pocket hole jig or are not comfortable with using one, you can also use flat mending plates!
Another fun way to take this kids oven to the next level is by adding plexiglass to the oven door. And a super easy way to attach it is with picture frame turn buttons!
The last detail for the oven is the burners. I attached square and round dowels on top of the oven to create the look of little gas burners! I just used 6 square dowels evenly spaced around the center of the burners.
And once I was happy with everything I attached the back panel and called the oven complete!
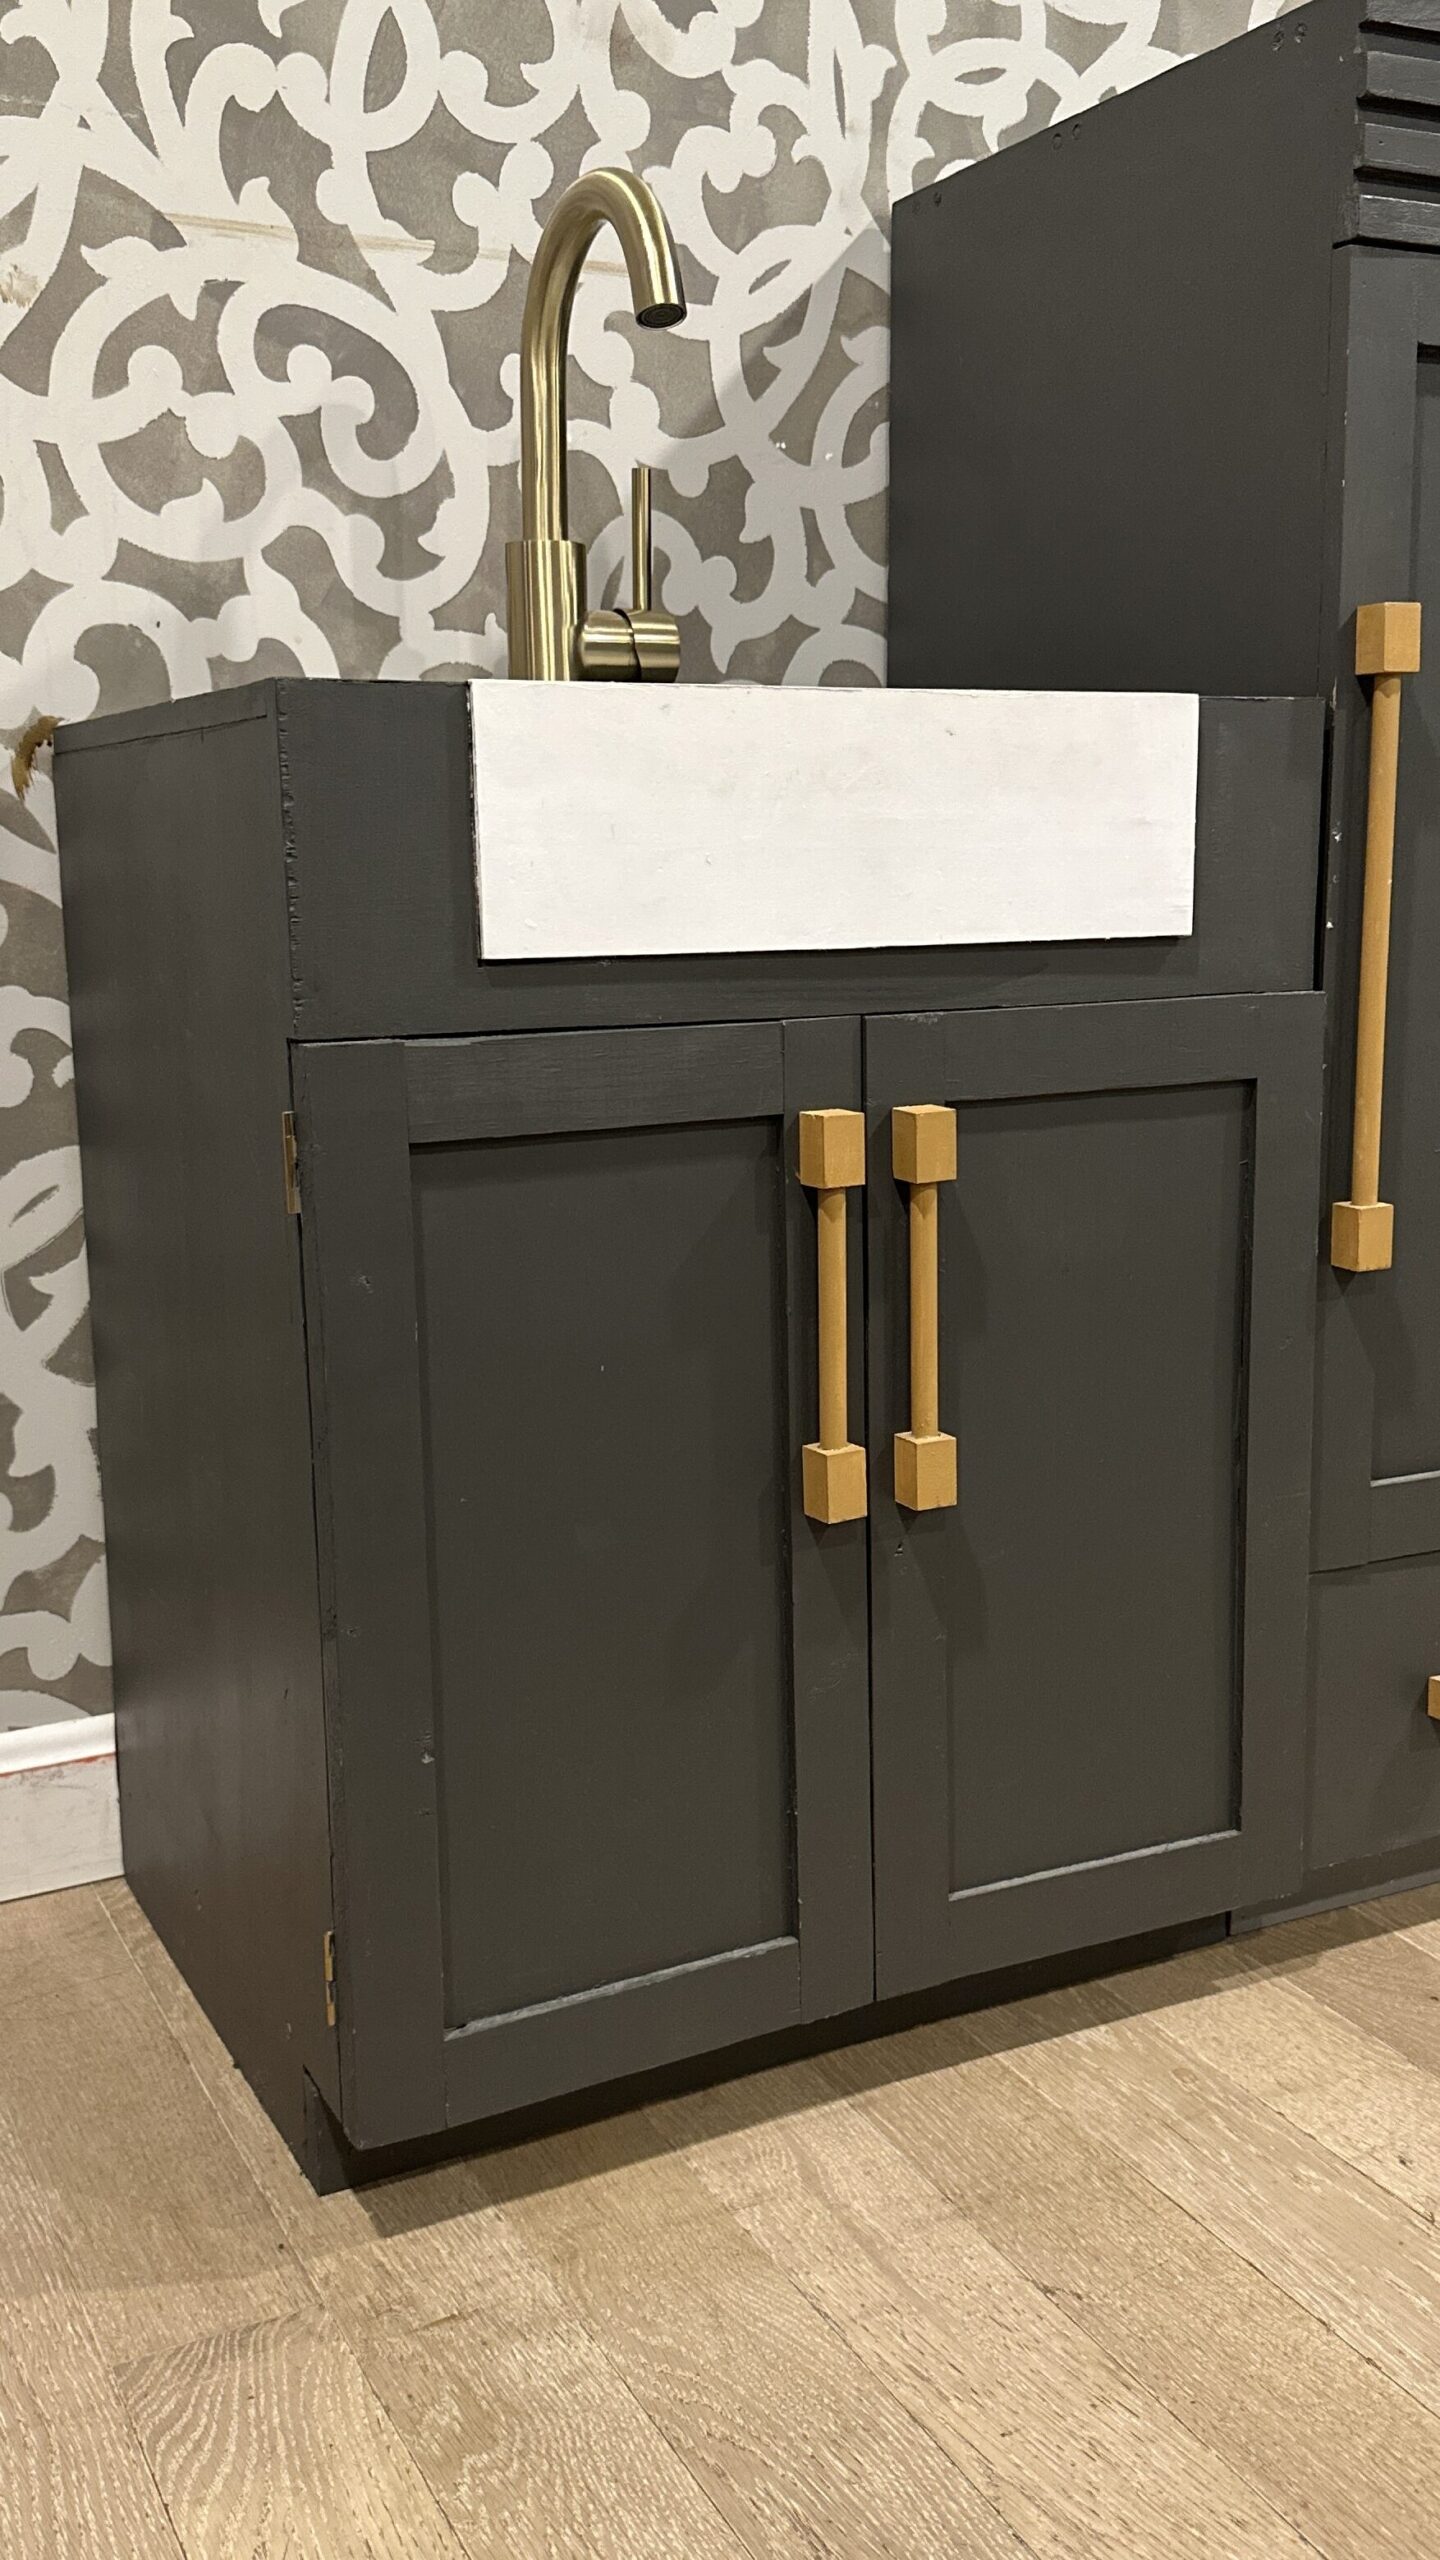
Kitchen Play Set – Sink

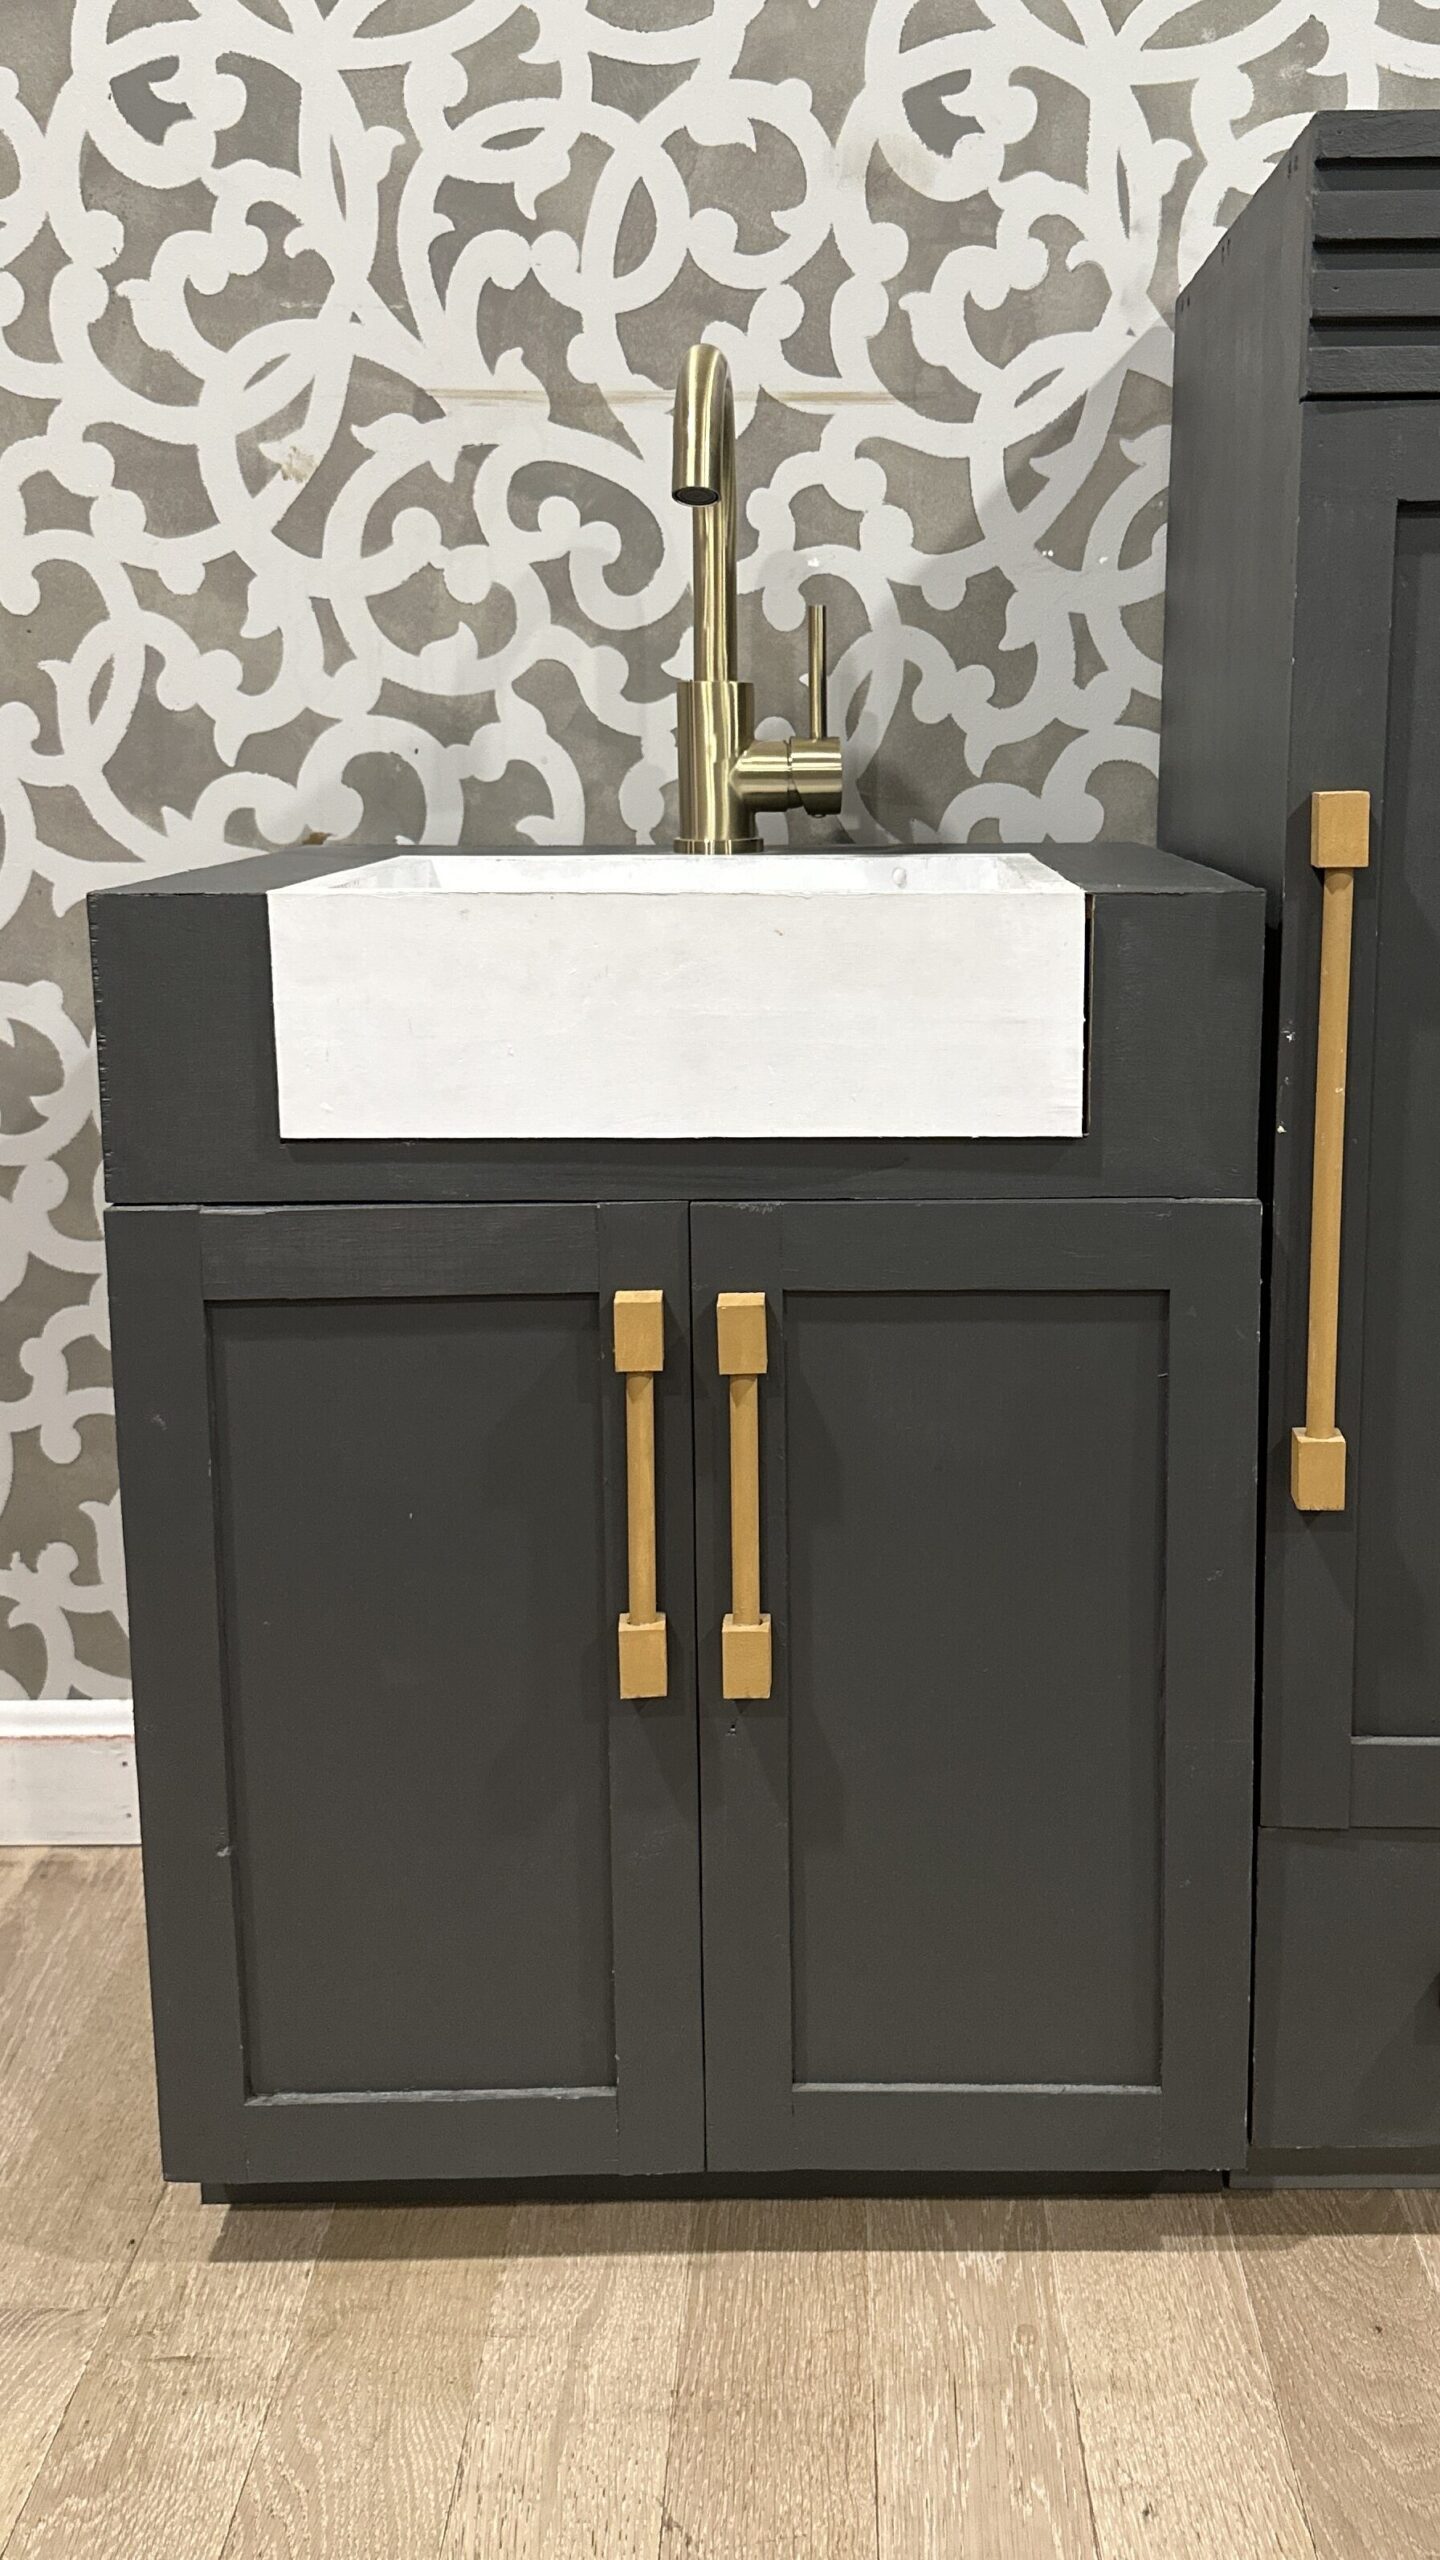
For the sink and sink cabinet , I started by building the actual sink “vessel” by making …. you guessed it. Yet another box.
Then you need to make the box for your sink cabinet , but… don’t attach the top just yet! Or go ahead and do it and make your life wayyyyy harder. You will see why in a minute!
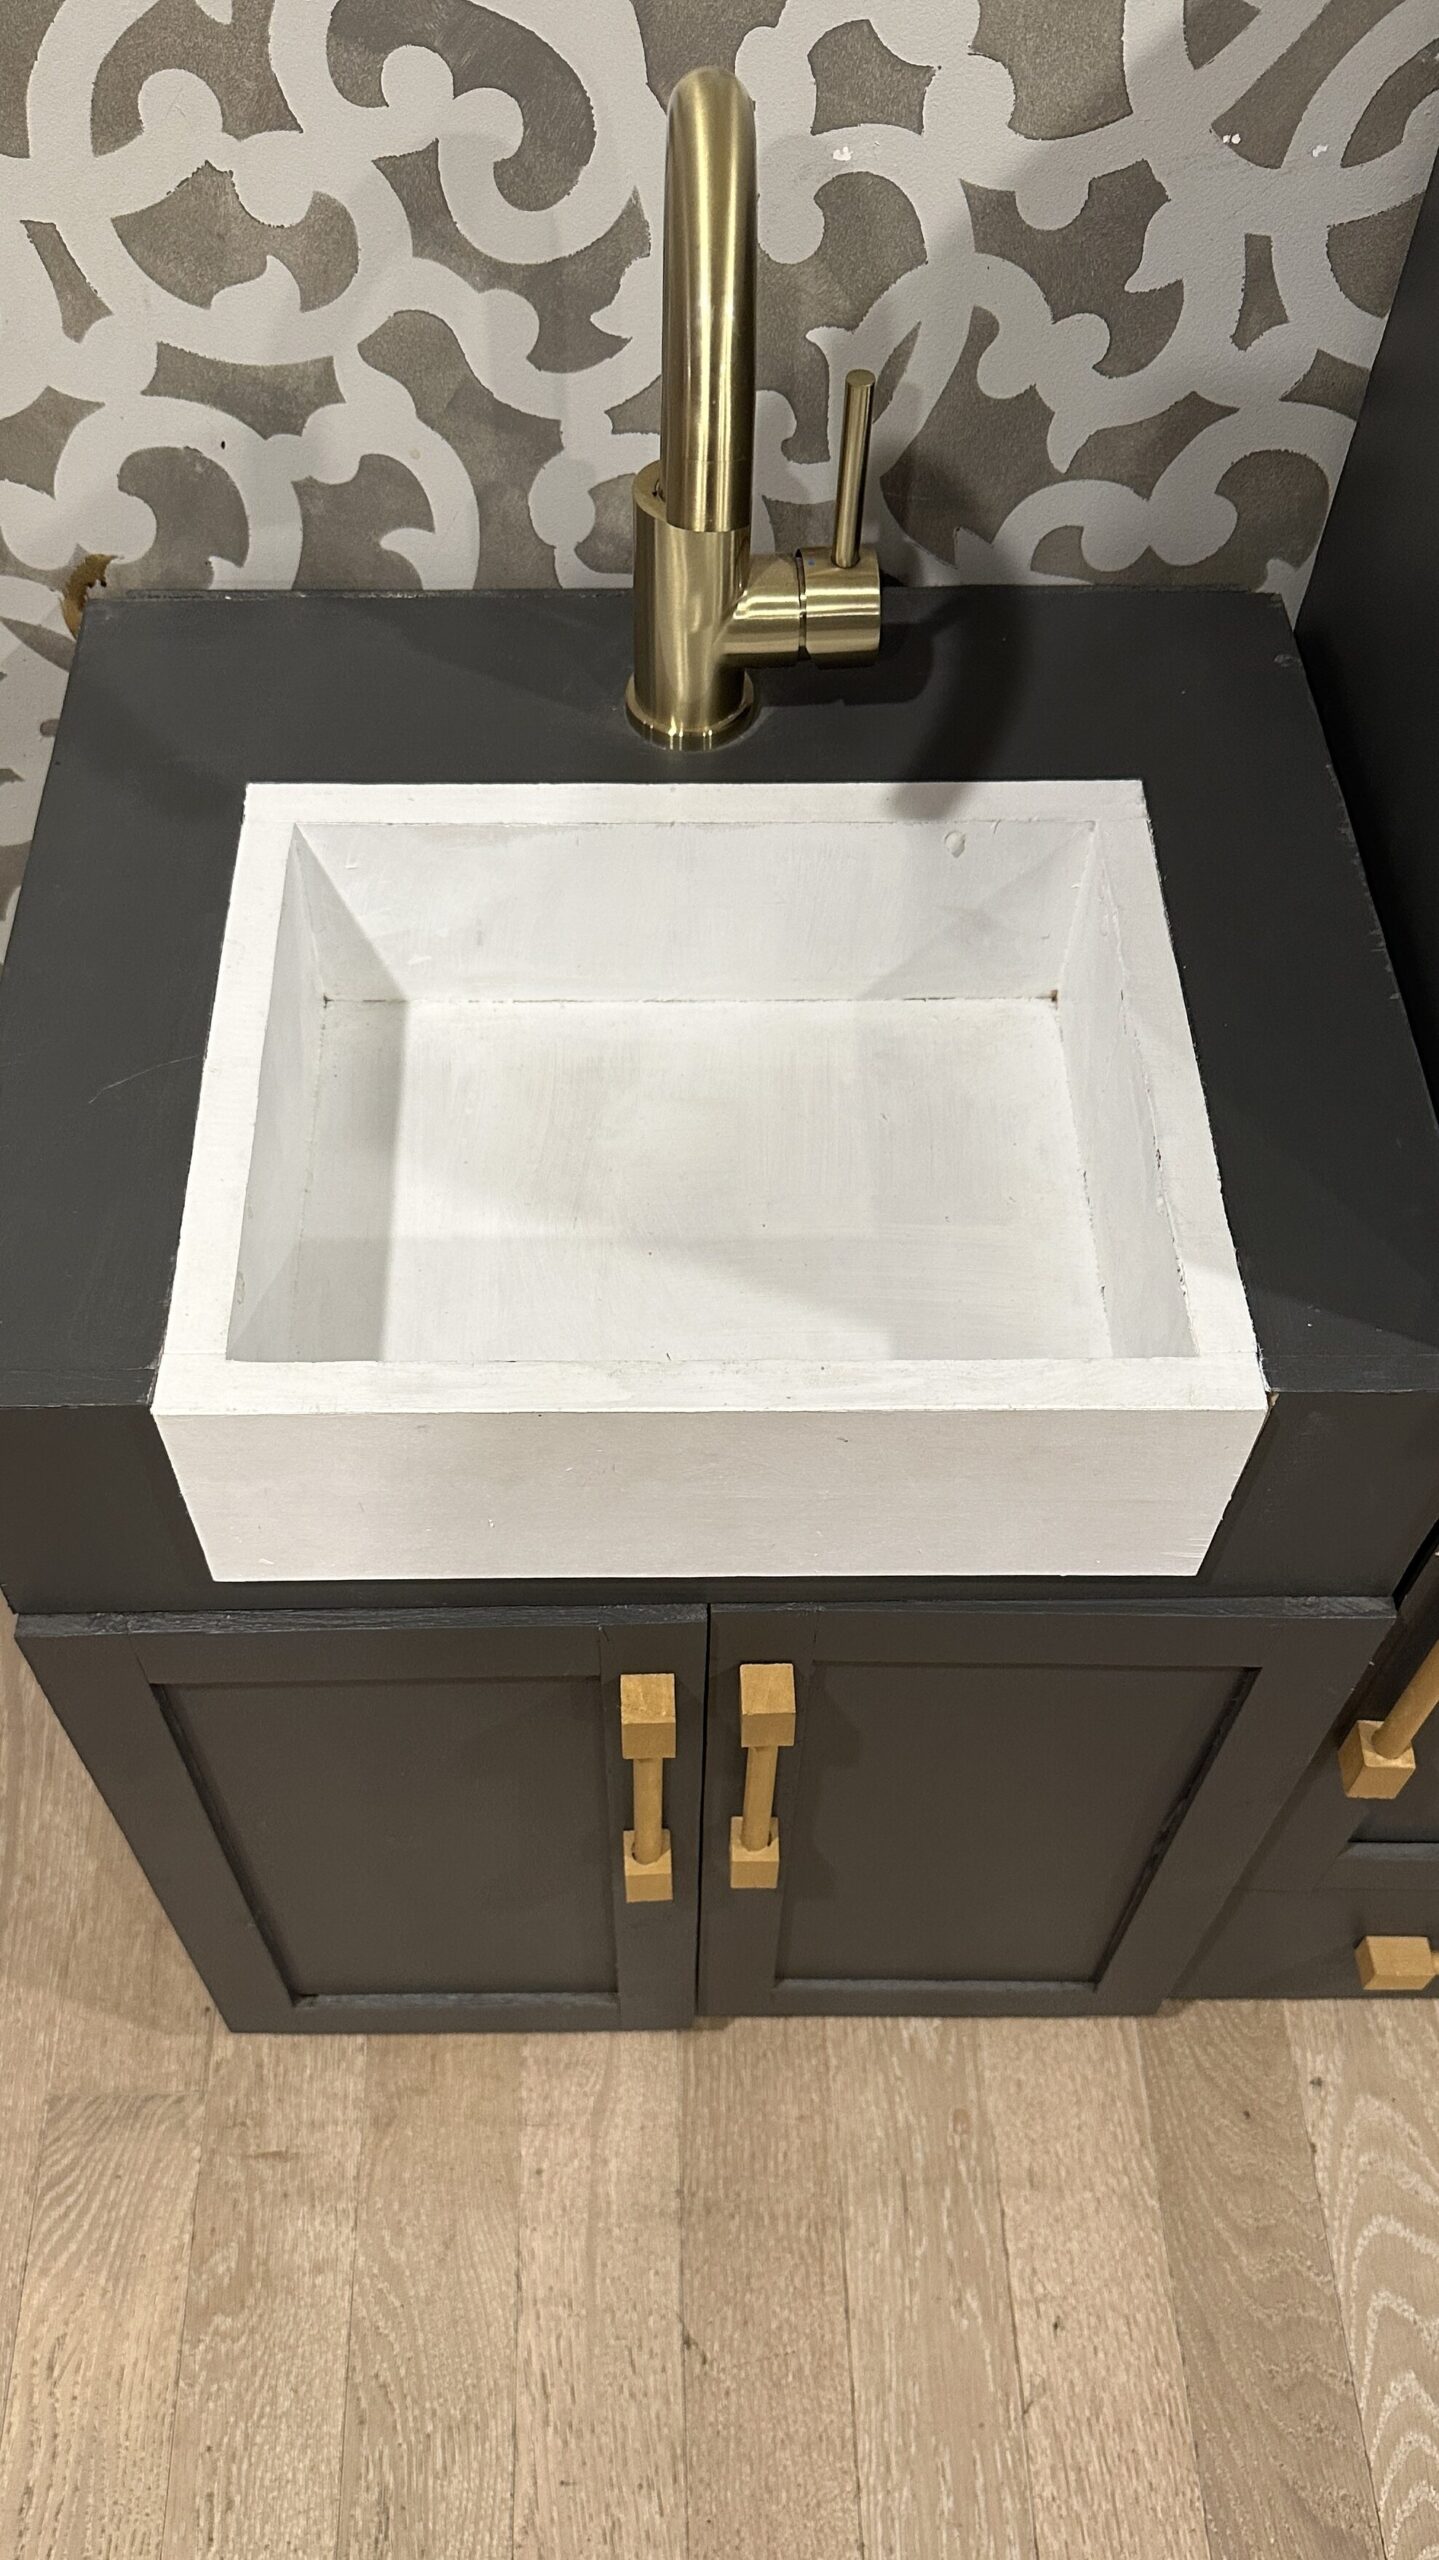
Once I had my sink box and sink cabinet box, I used it to trace the cutout in the top and front of the sink cabinet so it could fit right in just like a real farmhouse style sink.
NOOWWW you can attach the top piece of the cabinet and add your sink in there as well!
Once you have that then you can move on to the final pieces like attaching the bottom of the cabinet and the cabinet doors. ( These mini hinges are a lifesaver in this little project!)
And lastly, drill a hole in the back of the top piece for your faucet and attach it so that you have an official little sink for your kiddos!
FINAL HOT TIPS
If you want to make these look even more official, you can buy plywood edge banding and coverup all the exposed plywood edges.
I made my own drawer pulls out of wooden dowels. But honestly it was kind of a pain and I would suggest just buying hardware pulls for this and calling it a day!
I HIGHLY recommend adding a top layer of polyurethane to these pieces. This will make them FAR more durable and I didn’t do this with ours and I really really wish that I had!

This little play kitchen has been so well loved in our home. And I hope that your kids love this as much as mine do! I’ve even rounded up the most adorable little wooden food play sets to go along with it!
Again, for a full cut list and step by step building plans, you can download my free plan set for this project here! And as always, don’t forget you can browse the blog for even more DIY projects! See you over there!
DIY
Storage
DIY


binge the favorites
SHOP ALL FAVORITES →
Could Not Function Without This Digital Lifesaver...
Literally Would Live in a Pigsty Without This ...
I Wear These
( Almost ) Every Day...
sanity savers
Follow AlonG ↓
I’m all about keeping it real with my hair a glorious mess, rocking my favorite sweats, and ready to share it all...
the good, the challenging, and the downright ridiculous.

Leave a Reply