")
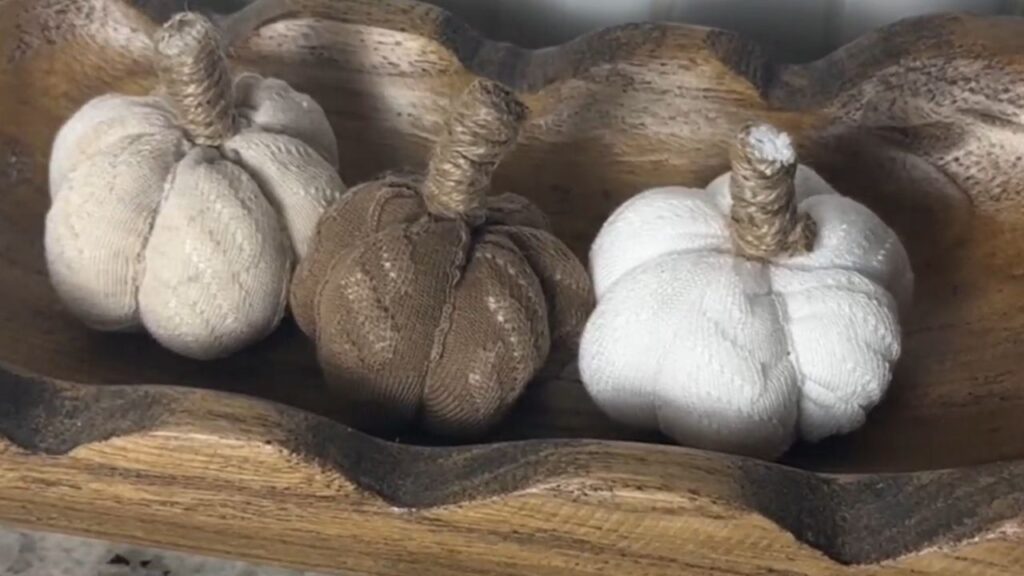
Creating DIY sock pumpkins is one of the easiest and most fun crafts for kids that also doubles as adorable fall home decor. If you’re looking for a creative and inexpensive way to add a cozy touch to your home this autumn, this simple craft project is perfect!
Whether you’re working with little ones or want to make these pumpkins yourself, this project is easy to follow and requires very few supplies.
Lemme show you how to transform old socks into the cutest little stuffed pumpkins that can be displayed anywhere in your home.
Annnndd as a bonus, this project is technically eco-friendly, since you’ll be repurposing old socks!
Now let’s get started on these DIY sock pumpkins that will cozy up your home this fall season!
Supplies You’ll Need
- Socks
- Twine or String
- Stuffing – Either fabric stuffing or more old socks that you can cut up for filling.
- Scissors
- Cinnamon Stick (optional)
- Hot Glue Gun (optional)
Step 1. Get Your Socks
It’s time to let those mismatched socks shine!
You can use any type of sock you have lying around, and they don’t need to be brand new. However… If you wanna make extra fun and extra cozy pumpkins, feel free to grab some socks with bright colors, bold patterns or interesting textures ( like extra fuzzy socks!) Don’t be afraid to get creative with the color and pattern choices!
HOT TIP: If you want to make different sizes of pumpkins, use socks of various lengths. Ankle socks will make smaller pumpkins, while knee-high socks will create larger, rounder pumpkins.
Step 2. Cut Off the Sock’s Top
Next, take your sock and cut off the top part where the opening is. You want to cut just enough to remove the excess fabric, leaving you with the main body of the sock. But be careful because you’ll need enough sock left to create a good-sized pumpkin shape.
HOT TIP: Make sure the cut is clean and straight. You don’t want any jagged edges, because you may see it on the top of your finished pumpkin.
Step 3. Fill Your Sock
Now it’s time to fill the sock with something soft to give it shape. You can use stuffing from an old pillow or even cut up another sock to stuff inside. If you don’t have any stuffing material on hand, fabric scraps from old clothes work well too.
Stuff the sock generously until it’s firm but not overly packed. You want the sock to maintain its shape but not feel too stiff.
HOT TIP: Use a pencil or pen to help push the stuffing into the sock more evenly, ensuring the entire sock is filled.
Step 4. Tie Off the Sock
Take your twine or string and wrap it around the top of the sock, pulling it tight like you would when closing a potato sack. This will be the base for your pumpkin shape.
Step 5. Create The Pumpkin Sections
After the sock is tied securely, use the twine to create sections along the sock’s body, forming the segments of your pumpkin. The more sections you create, the more “pumpkin-like” the final result will appear.
Step 6. Add the Stem
Once the pumpkin shape is complete, it’s time to add a stem! The easiest way to make a stem is by using twine and wrapping it tightly at the top, right where the sock is tied off.
But if you prefer a more natural look, use a cinnamon stick as the stem by hot-gluing it to the top of your pumpkin.
HOT TIP: You can also use a real twig from outside to create a more rustic feel. Simply glue it on or push it into the top where the twine is tied.
Give your sock pumpkin a final touch by trimming any excess twine, securing it with a dab of hot glue if needed. And now you have an adorable little sock pumpkin you can enjoy all season long!
For more fun seasonal crafts and DIYs, click here!
Or watch this project over on YouTube! ↓
Watch on YouTube!
DIY
Storage
DIY


binge the favorites
SHOP ALL FAVORITES →
Could Not Function Without This Digital Lifesaver...
Literally Would Live in a Pigsty Without This ...
I Wear These
( Almost ) Every Day...
sanity savers
Follow AlonG ↓
I’m all about keeping it real with my hair a glorious mess, rocking my favorite sweats, and ready to share it all...
the good, the challenging, and the downright ridiculous.

Leave a Reply