")
When working on DIY projects, choosing the right fastener is crucial for a successful and durable result ( trust me… I’ve learned the hard way!) There are what feels like a zillion types of screws, nails, anchors, and adhesives, and each one is very very different… and that’s why I decided to make this ultimate guide to fasteners for DIY Projects! Hopefully it will help you understand when and where to use each type so you don’t have to learn the hard way too! ( *wink wink )
Wall Anchors: Which One Do I Need?
As the name suggests, wall anchors are used when securing screws into drywall, concrete walls, or other walls where you don’t have a wood stud.
Basic Plastic Anchors (CHEAP)
These are cheap because they are just plastic little pieces that rely completely on expanding behind the drywall. I know they are cheap and it’s tempting but as your friend… I’m telling you to NEVER BUY THESE ANCHORS. They are just not strong enough and can potentially pull out from the wall if you hang something really heavy from it. And then BANG BOP BOOM… there goes your beautiful DIY project.
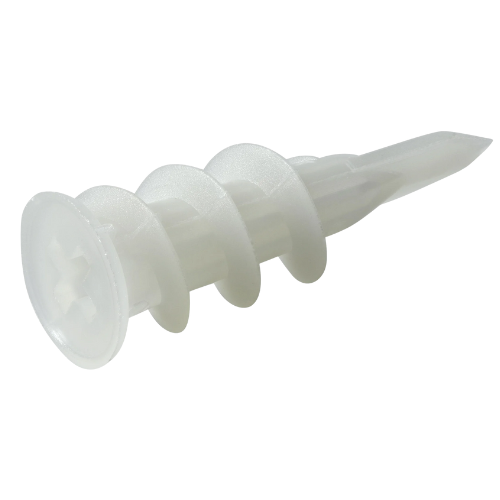
Threaded Wall Anchors ( Upgraded Option )
These are a stronger version, and usually a more expensive one but THESE ARE WORTH IT . They have threads that allow them to grip the drywall ( similar to a screw!) , providing a much, much stronger hold. Once your anchor is inserted, a screw is driven into the anchor for a really strong and durable connection. Meaning that your incredible DIY is not gonna budge for a very long time!
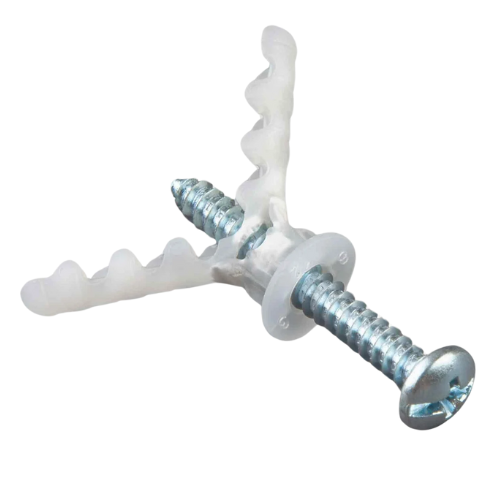
How Do They Compare?
Plastic Anchors ( left) : Cheap and weak hold. ( Just don’t get these… please)
Threaded Anchors ( right ): More expensive, but adds more security and durability for hanging much heavier pieces. Trust me.. these are the ones you want.
Picking The Right Types of Screws For Your Next Project
Moving on to screws, I would say that these are probably the most common fastener. Or at least what most people think of when they think of a fastener. But did you know that there are actually a TON of different types of screws? All with their own unique design and purpose. So double check and make sure you grab the right ones for your next project!
Let’s Start with the Basics – Heads and Threads
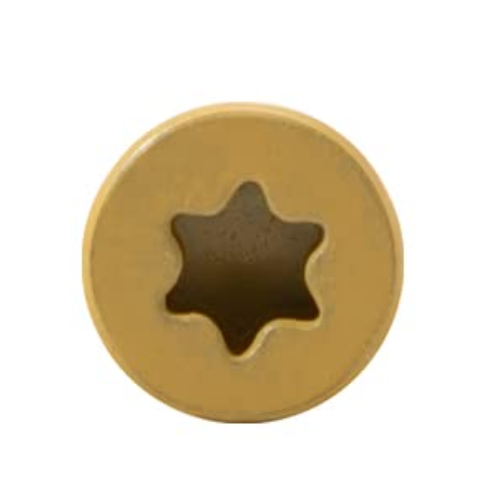
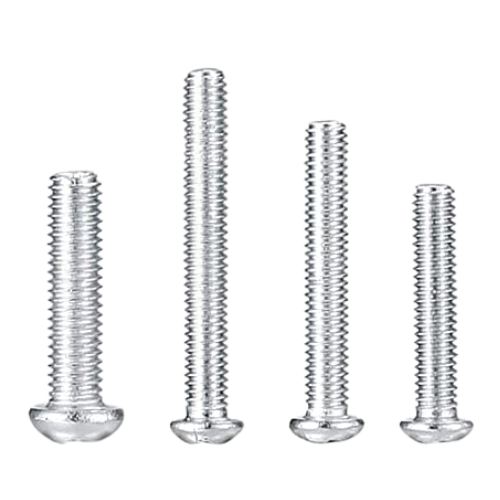
There are generally two types of heads on a screw , a Phillips Head and a Star Bit head.
Phillips Head Screws ( left ) are very common, so these are easier to find but also more prone to stripping. ( womp womp )
Star Bit (Torx) Screws ( right) are not as common because these are more specialized for super heavy duty projects since they are more durable and less likely to strip.
And for threads, you will usually see screws described as either “fine” or “coarse”.
Fine-thread screws provide better grip in smoother and harder materials like metal or hardwoods.
Coarse-thread screws are more ideal for softer materials like wood because they grip into the soft material much better.
Now on to the Specialty Screws :
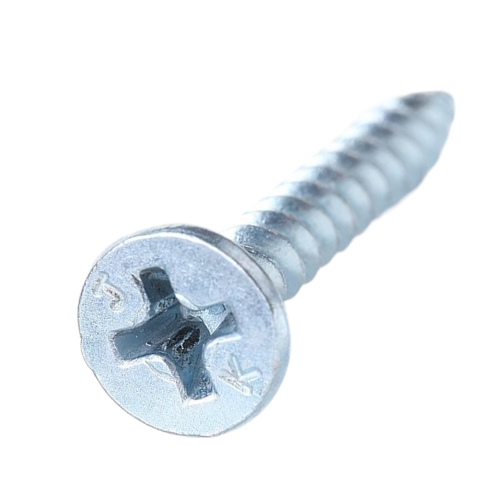
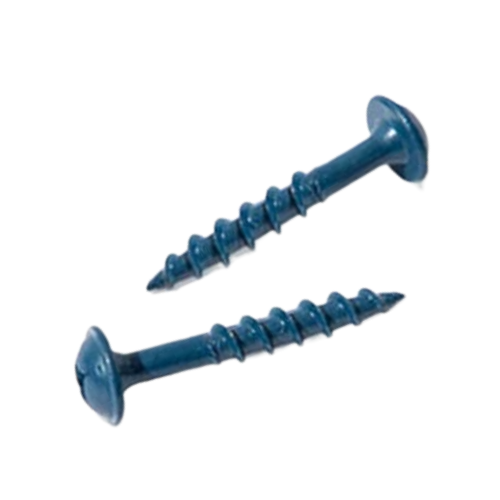
Wood Screws
Wood screws like these are designed for joining pieces of wood together. ( Groundbreaking right?) They typically have a cone-shaped head that sits flush into the surface of the wood when fully screwed in. This shape is what makes them ideal for woodworking projects like building furniture and framing because your project won’t have little bolts sticking out all over the place. And for an even cleaner finish, try pre-drilling your holes before inserting your wood screws to prevent any splitting.

Machine Screws
Machine screws are used more in assembly and less of a “building” type of way. They often have a flat bottom that is intended to be used with nuts or already threaded holes in metal, plastic, or machinery parts. And unlike wood screws, they have a uniform thread designed for precision instead of for grip. You’ll mostly need these when you’re assembling appliances, electronics, and metal structures.
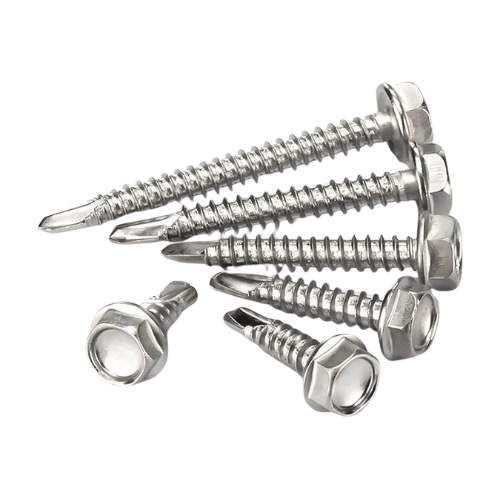
Self-Tapping Screws
These screws have a sharp tip that allows them to cut their own thread into materials like metal, plastic, and wood. Which means they are an excellent choice when you are working on something where drilling a pilot hole is impractical.
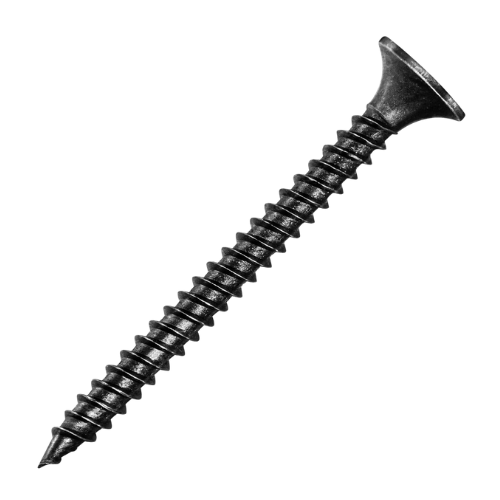
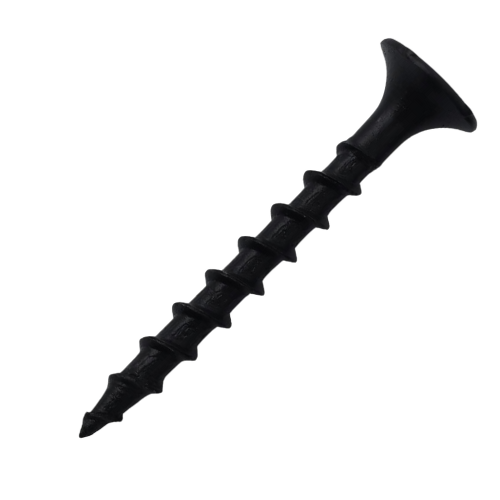
Drywall Screws
Drywall screws are specifically designed to attach to… you guess it! Drywall! They can help you attach drywall to both wood and metal studs. The key thing that makes these different is that they have a bugle head to prevent tearing the paper surface drywall has. They also come in either a fine thread ( left ) or a coarse thread ( right ) option depending on the project.
Unsure which type you need? Just remember this ;
Fine-thread drywall screws are best for metal studs.
Coarse-thread drywall screws are best for wood studs because they grip better.
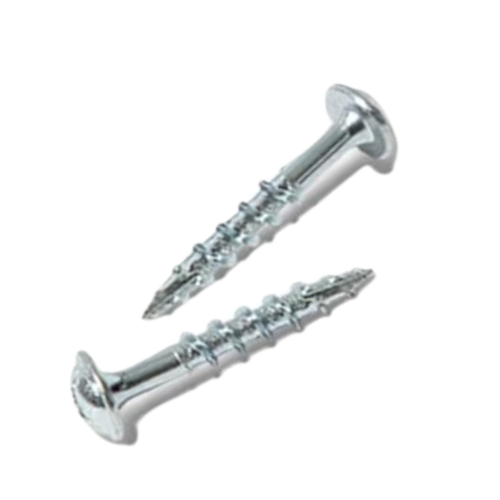
Pocket Hole Screws
Okay, this one is another doozy… Pocket hole screws are designed for….POCKET HOLES. Using pocket hole joinery is really useful whenever you are building something where you don’t want to see the screws on the outside of your project. They are great for building furniture and cabinets especially. They come in two handy dandy varieties:
- Interior pocket hole screws ( left ) : These are going to be your go -to for pocket holes because they have a smaller pan head which means they will be much harder to see on your final project.
- Exterior pocket hole screws ( right ): These are coated to prevent rust and have a larger head when over an inch in length so they are harder to conceal.
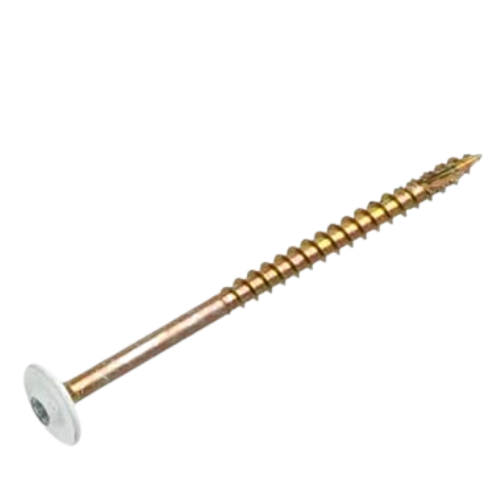
Cabinet Screws
When you look at a cabinet screw, you will see a flat head with a star bit in the middle. This is important because the flat head keeps the screw from sinking into the cabinet face frame when securing cabinets together. These screws keep you from screwing too far and compromising the structural integrity of your cabinets. You know, just a little bit of a big deal right?
Psst! Screw Bonus Tip! : Have a Stripped Screw? Here’s How to Remove It!
If you haven’t had the displeasure of dealing with a stripped screw on your DIY journey yet… consider yourself lucky! Basically it’s when the top of the screw where there should be a nice little groove for your screwdriver or drill bit to grab onto… it’s completely pulverized and the grooves are smashed flat. Zero fun. And if you have, try these tips on the next one that tries to “screw” you over ( see what I did there?)
You can try simply using a square bit for a lil’ extra grip.
Or for a really stubborn screw, place a rubber band or elastic over the head before using a drill bit. It’s kinda the same idea as using a dish towel to help get a better grip on a stubborn jar of pickles.
You’re welcome.
Brad Nails Vs. Finish Nails
The most common types of nails are generally either Brad Nails or Finish Nails. Here’s the rundown…
Brad Nails
- Have a higher gauge number (meaning a thinner shaft).
- Are usually shorter, typically 2″ or less in length.
- They have a very small head which makes them easy to cover with wood filler. Think similar in shape to a really thick needle.
- These are best for lightweight trim, moldings, and delicate woodworking.
Finish Nails
- Have a lower gauge (much thicker than brad nails), typically 16 gauge.
- Are available in 1″-4″ lengths.
- Provide a much stronger hold than brad nails.
- These are best for heavy trim work, baseboards, and paneling.
What’s the Difference and Why Do I Care?
- Brad nails are better for delicate work where a small hole is preferable. So these are better when installing trim and paneling.
- Finish nails are more common because they offer more holding power since they are larger but they leave a larger hole that may require filling later on.
Real Quick Let’s Also Talk about Liquid Nails…
Liquid Nails is a powerful adhesive that is commonly used when installing shiplap and wall paneling because it lets you attach the paneling to the wall without using power tools HOWEVER… I would highly encourage you to never use this stuff if you ever want to remove the paneling in the foreseeable future. Sometimes it pops right off, and then sometimes it will rip out half your drywall with it. Which I’m sure I don’t have to tell you is not fun.
So if you decide to install paneling or shiplap to your walls and don’t wanna play Liquid Nails roulette , try this tip instead ;
Create an “X” pattern with your brad or finishing nails by driving them in at an angle. This anchors the paneling just as securely and won’t let the nails slip out while still making future removal easier. ( Your drywall, thanks you!)
Glue Options for DIY Projects
Because let’s be honest, sometimes we just want a quick fix without messing around with the power tools. But I do feel like it’s my responsibility to tell you that when you are building larger projects sometimes you will still need some of the fasteners above in addition to using some of these glue options.
Titebond Wood Glue
Wood glue is a special type of glue that helps attach two different rough wood surfaces together. Titebond happens to come in two variations;
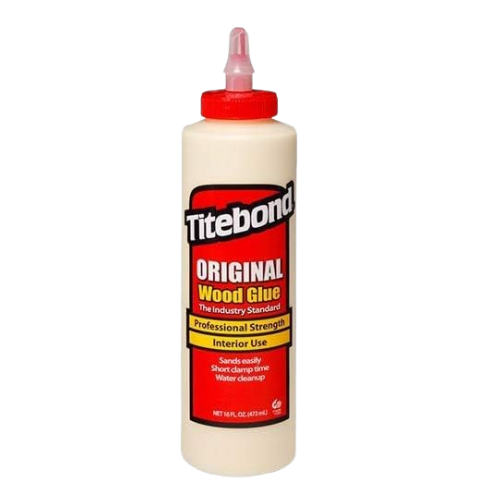
Titebond Original is the OG General-purpose wood glue and perfect for most of your woodworking projects.

And Titebond IIl , is the waterproof brother best for cutting boards or outdoor projects.
E6000 Craft Glue
This is a crafter and DIYer’s holy grail. I truly believe that some determined DIYer could quite literally build an entire house with this stuff because it is super strong when used and set properly and it works on just about any material. Wood, plastic, metal, fabric… you name it, this stuff will usually stick.
Super Glue
Oh good ol’ super glue. This glue is perfect for quick whoopsies and repairs. But usually is only good for small projects and not as strong as the other glues for larger projects.

Okay that’s all I got, bet you didn’t know I had so much to say on fasteners did ya? Neither did I!
But I hope this DIY guide to fasteners helps take a lil’ of the guesswork out of deciding which fastener to use on your next project so it doesn’t go CRASH BANG BOOM on ya! Because that is the worst and I want your beautiful projects to succeed! I can’t wait to see what you make!
And don’t forget to check out more DIY projects on the blog!
P.S. If you are still unsure about which fastener to use, tell me about your next project in the comments below and I’ll help you decide!
Watch On YouTube!
DIY
Storage
DIY


binge the favorites
SHOP ALL FAVORITES →
Could Not Function Without This Digital Lifesaver...
Literally Would Live in a Pigsty Without This ...
I Wear These
( Almost ) Every Day...
sanity savers
Follow AlonG ↓
I’m all about keeping it real with my hair a glorious mess, rocking my favorite sweats, and ready to share it all...
the good, the challenging, and the downright ridiculous.

Leave a Reply