")
Hanging wallpaper in a room can seem intimidating at first, but I promise it’s not as scary as you think!
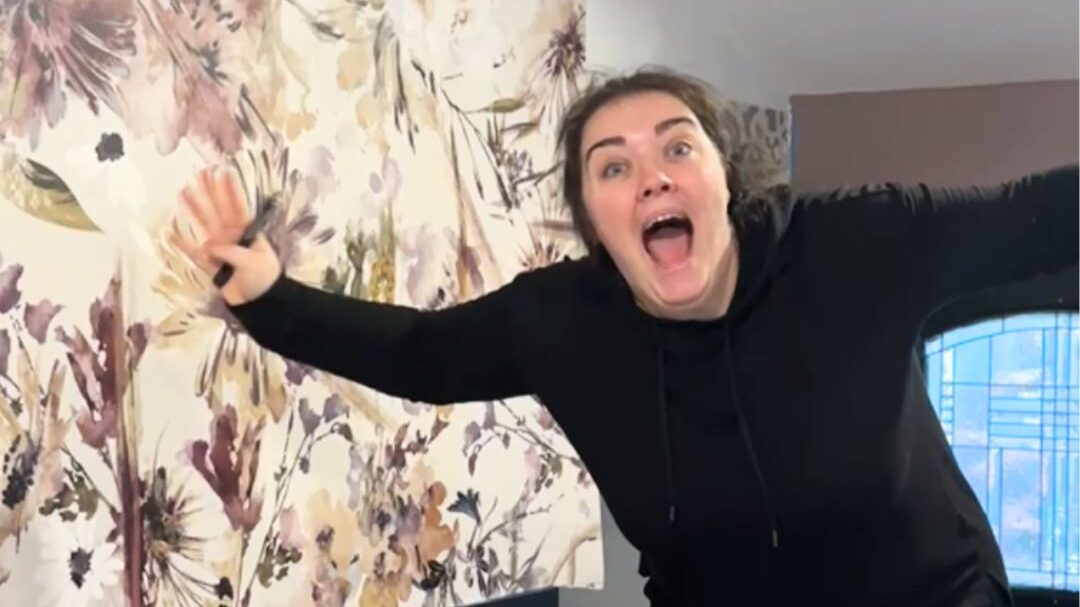
If I can wallpaper, so can you. I’ve recently finished not one , but two wallpaper projects in my home and I am obsessed! It is much more durable than simple paint, which is great especially with multiple toddlers running around your home.
My biggest tip? Make sure you always know where your X-Acto Knife is so you don’t fall into the same crisis I did.
Oh and also… Peel & Stick Wallpaper… (DON’T DO IT!) It may seem like the more beginner friendly option but I promise you… IT IS NOT. With regular wallpaper that requires paste, you have much more wiggle room to fix errors and it is way less frustrating to install.
Wallpaper Essentials – A List Of Everything You Will Need :
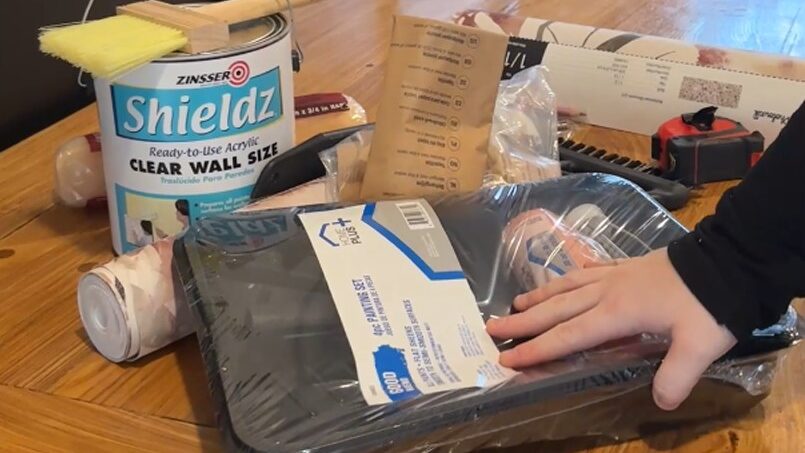
Wallpaper Primer – apply this to your walls before wallpapering to seal the drywall or pre existing paint.
Brush – use this to apply paste to the back of the panels.
Wallpaper Paste – use this to apply if using non pasted paper.
Wallpaper Smoother – use this to avoid air bubbles.
Utility Knife – use this to make clean cuts.
Measuring Tape – use this to make sure you are cutting the correct length and not wasting anything.
Level – use this to keep your wallpaper straight. It can also serve as your straight edge to cut against.
Pencil – use this to mark measurements or label things.
Bucket & Sponge – use these to keep the paper clean and avoid any leftover paste.
Seam Roller – use this to press down your seams and get a flat finish.
Want To Make Your Wallpaper Life Easier? Grab These Too:
The following items aren’t necessary, but they will make your life much easier when tackling your wallpaper project!
Laser Level – it is much easier to set up a laser level and not have to continuously pick it up a level every time you apply a new panel.
Scissors – use these to cut your panels (I just use my utility knife).
Wallpaper Scoring Tool & Steamer – use these to remove old wallpaper before hanging new paper.
Brush & Roller – if you prefer to apply the paste to the walls instead of the paper itself.
Drop Cloths – protects the floors from the glue.
Spray Bottle with Water – activates dry paste if you are using pre pasted paper.
Sander – this one is my favorite because it is a BEAST! ( and you can use code ‘builtbylex‘ for a discount!)
The Process : Prep, Application , and Troubleshooting… because there WILL be trouble!
I know you are intimidated but I promise it will be fine! We are gonna get through this together! Lemme walk you through the wicked fun process (and a few of the crazy moments that have happened to me along the way!).
1. Wall Preparation
The first thing you absolutely have to do is prep the wall. This is super important because you want to make sure that the wall you’re working on is as smooth as possible.
I started by scraping the walls with this, which was surprisingly satisfying, and did not take very long. This got rid of any lumps and bumps that the plasters left behind when they plastered the house. Then I sanded them smooth. I always use this sander because you can hook it up to any shopvac and it eliminates the dust getting all over the place. Just make sure you remove even the tiniest bit of texture on your wall. It will drastically affect how your new wallpaper goes up, and it might cause some bubbling or peeling which will take away from the overall look of the finished job.
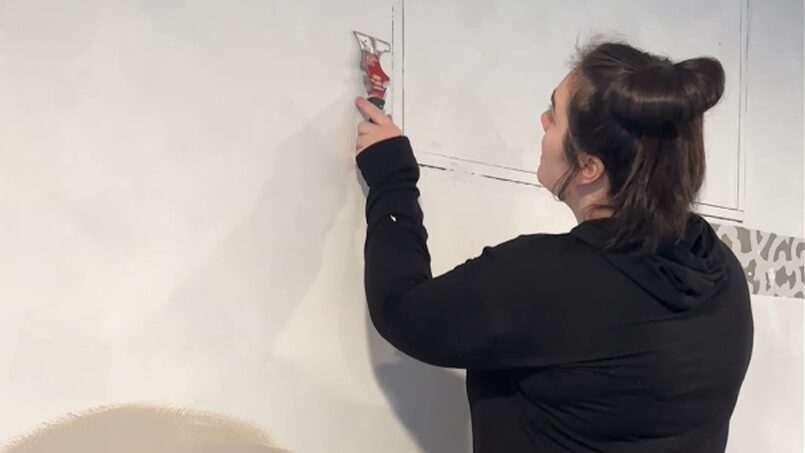
2. Primer
PLEASE do not forget the wallpaper primer!! Primer is essential in this process. It seals the drywall or paint that was there first and helps the wallpaper stick better to the wall.
This is so important especially if it is plain drywall because drywall is extremely porous. If you don’t prime it – it will soak up the wall paper paste which wont allow it to stick as well as it should and you’ll probably end up with a toddler walking around with a strip of wallpaper on their head once it finally gives in and peels right off the way.
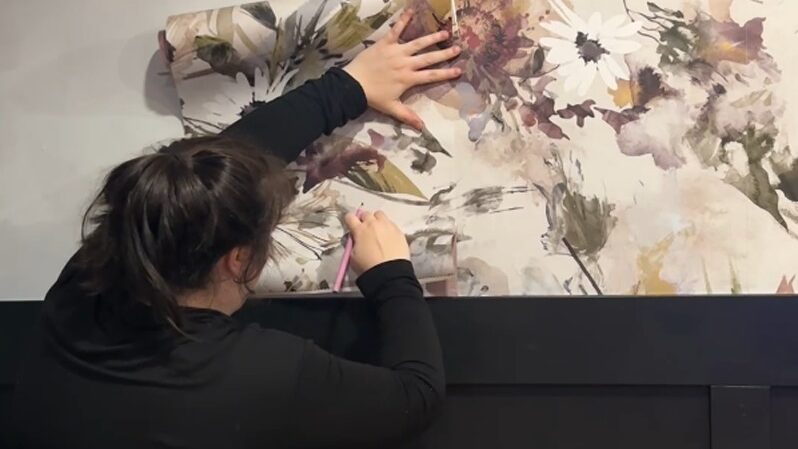
3. Prepping The Wallpaper
Once your walls are primed and smooth like butter – they are ready for that gorgeous wallpaper.
First, mix up the wallpaper paste with some water. For some reason every time I wallpaper, I pour the paste in first and then add water to it. Don’t do it this way!!! It gets super clumpy and it requires more elbow grease for mixing it all together.
I suggest pouring the water in the bucket first and then slowly adding in the paste powder and mixing it as you go. It may still be a bit clumpy but its not going to ruin anything for you. If you let it sit after its all mixed for a few minutes, it will get thicker and almost look as if it doubled in size. My husband always says it looks like white applesauce. Haha!
Oh and if you need a good suggestion for where to buy your wallpaper.. I suggest getting it from here.
I know, I know. It is extremely expensive but it is SUCH GOOD QUALITY. Take it from the girl who unrolled hers on the floor to get a good gander at it only to have her excitement briefly bulldozed by the dog, who decided to walk across the wallpaper while I was distracted helping one of my kids with something. He’s lucky it’s such good quality wallpaper, it didn’t tear or even wrinkle (Thank GOD!), but that didn’t stop me from panicking for a hot second. So when I tell you this is quality wallpaper… I mean it. It’s thick and smooth and everything you look for in a good quality wallpaper.
4. Apply the Paste
After I finished helping my kids and scooted the dog outside, I got back on track.
I brushed the paste onto the back of the wallpaper using a tool like this. Just make sure you cover the strip of paper completely.
Now, I had heard through the grapevine that it is much easier to apply the paste directly to your walls using a roller & brush. So, for my second wallpaper project I tried this out. Did it go faster? Yes. But, honestly… not much faster.
So I suggest just trying out both ways and see what you personally are more comfortable with.

5. Troubleshooting
No matter what wall you choose to cover you will always run into obstacles that need to be worked around…
For example; In my living room it was my thermostat and attic access. In my bathroom it was my outlets, light switches, wall sconces, wall niche, door casings to the closet and entry door and even the trim around the shower opening.
I actually ended up taking the trim off of all three openings because they were all so close to the end of the wall and it would have been a major pain in the buttox to have to try and get the wallpaper in such a tight space. I don’t even think I would have been able to get the knife into place to slide the remaining paper up against the trim pieces.
Want to know the best way I’ve found to cut around outlets without slicing the entire sheet? Line up the wallpaper pattern, mark the middle of the outlets, then mark each corner of the outlet. I suggest marking everything a little too small. You can always cut bigger.. You cant make the material grow back if you cut it too big. Just like a haircut… be sure you want those bangs before ya cut ‘em! Make sure the cut is big enough to fit perfectly around the openings but small enough that the outlet or light switch cover is going to cover it up when it is put back on.
This part can be kind of tricky… trying to match up the pattern and make the cuts look seamless can be frustrating. Take your time and try to be patient. Patience isn’t always my strong suit so I get it if you lack that too.. LOL.
Oh! Another hot tip… During my living room project, I was in the zone. The wall was coming out exactly as I imagined. I got distracted by a toddler yet again and I lost my X-Acto knife.
You know, that super sharp stabbing triangle shaped knife?? I searched for that stupid thing for a good two hours and I was so irritated because I could have been done hanging all of the paper by that point. Thankfully, my kids were in bed at this point, so I didn’t have to worry about them finding it. Unfortunately I finally did have to order a new one to get the job done and of course by the morning when the new one was delivered, I finally found the old one.
My super mind-blowing hot tip for you is maybe DON’T LOSE THE KNIFE!
Avoiding Air Bubbles & Future Peeling
If you buy a wallpaper kit like this, make sure you only use the metal straight edge when cutting the excess wallpaper. Do not use this to smooth out your paper or all of your hard work will be in the toilet. Instead, use something like this . The brush is great but it only allows you to put minimal pressure which may not get all of the lumps of paste under the paper completely smooth. I prefer the baby wipe for two reasons;
- It allows you to give pressure without having the plastic backing to it which would demolish your paper if you push too hard.
- It’s a baby wipe… so its also wiping away any excess paste that may have gotten on the top of the paper.
My biggest tip when smoothing it out would be to always start of the side of the wallpaper that doesn’t have another strip hung yet and smooth the wipe towards the seem of the piece you’re working on and the piece next to it. This will push any remaining blobs of paste to the seem between the two. Then I like to to run the baby wipe from the top of the piece down to the bottom directly over the seem to make sure I got any and all leftover paste off of the top of the paper.
Call me crazy – I also like to use a brush , scoop up some paste and run it down the seem of the two pieces of paper. I then let it sit for a few minutes and then wipe it away using these. Honestly – I have no idea if this actually does something… but in my head, it seals the seems down and leaves less of a chance of them peeling later.
The Biggest ( and easiest! ) Mistake To Avoid!
Did you know there are generally two types of wallpaper to choose from? A repeating pattern or a wall mural. And guess who learned the hard way the big difference? This gal right here!
In my bathroom – I picked a wall mural and I didn’t even know until the end. Why is this a problem? Well… if you are wallpapering the circumference of an entire room a wall mural is not what you should choose. And on the very last panel I hung, I realized I had made this huge mistake.
Luckily, because of the wall niche in the wall and the door frames I had to cut around, I had a ton of paper left. The second to last piece I had put on the wall did not have much of a pattern that fell into the seam so I grabbed all of my excess paper and found another piece just like that. The paper was also too wide for the blank wall space that was left. I lined it up to where the seams didn’t have to match up and were pretty blank. I then overlapped each panel and used a straight edge to cut directly over BOTH panels AT THE SAME TIME. Next, just take the excess from each panel off and you should be left with a perfect seam that is barely noticeable.
Also, I lucked out that this fell right above my closet door so honestly, I’m probably the only one who will notice it. Well… me and everyone else who reads the blog.
If you have any questions or need help with your wallpaper project just drop them in the comments below. 🙂
DIY
Storage
DIY


binge the favorites
SHOP ALL FAVORITES →
Could Not Function Without This Digital Lifesaver...
Literally Would Live in a Pigsty Without This ...
I Wear These
( Almost ) Every Day...
sanity savers
Follow AlonG ↓
I’m all about keeping it real with my hair a glorious mess, rocking my favorite sweats, and ready to share it all...
the good, the challenging, and the downright ridiculous.

Leave a Reply