")
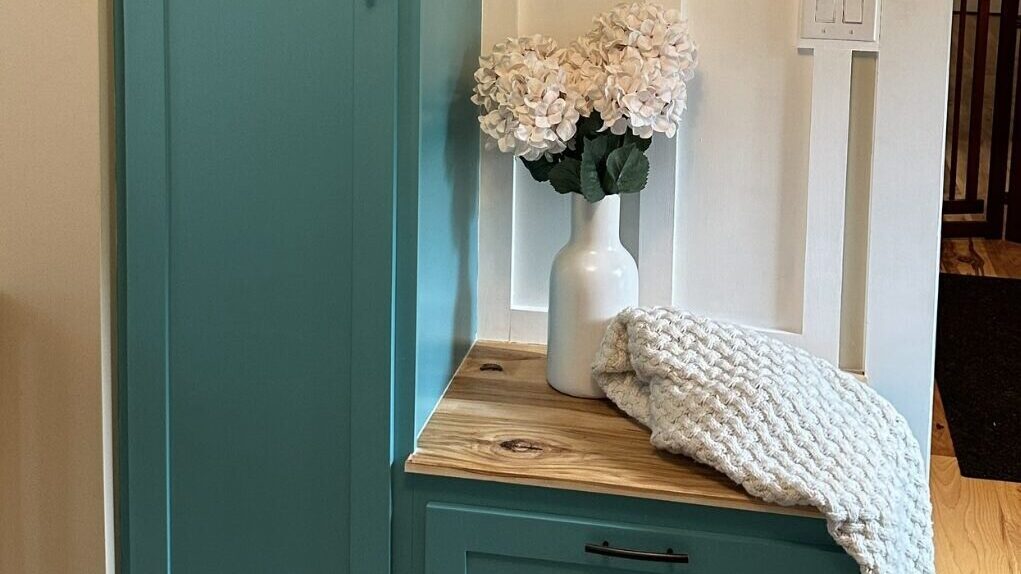
Recently, I built a completely custom mudroom cabinet wall for a family friend. My goal was to create a practical, stylish storage solution where our friends could hang their coats, store their shoes, and give a home to all the other day to day clutter that can accumulate in a home.
I am absolutely THRILLED with how this build turned out buuttt there is one thing that REALLY IRKS ME… ( more on that later! )
Between the awesome amount of storage these cabinets added and the crazy fun pop of color we finished them in, this has easily become one of the projects I get asked about the most!
So I decided to lay out all the details for you here on the blog! Everything from the materials and tools you will need, to the exact steps we took, this post will have everything you need to build your own custom mudroom cabinets!
Oh… and don’t worry I’ll link everything I used ( including the plans ) so you can easily grab everything you need for your own project and get started!
Here’s What You’ll Need:
When building this custom mudroom cabinet, I wanted to make it as beginner-friendly as possible. I purposely tried to use materials and tools that are easy to work with but that will still get the job done RIGHT.
Materials:
- 3/4″ Birch Plywood: This is the main material for the cabinet boxes. It’s strong, lightweight, and has a smooth surface that takes paint well (& looks pretty when it is sealed with a water based polyurethane to protect the inside) making it the perfect choice for a project like this!
- 1×2 and 1×3 Select Primed Pine: These will be for the face frames of the cabinets, which will give the cabinet a more finished look and also provide strength and structure to the boxes.
- Wood Glue and Screws: These will be for assembling the cabinet and face frames. ( Pssst… if you want some more info on which screws and glues are best to use for different types of projects, you’ll want to read this blog post! )
- Paint or Stain ( of your choice ): I chose to paint mine Pacific Ocean Blue by Benjamin Moore, but you can use any color you would like or you can also stain the wood for a more natural look.
- ( *Optional ) Shaker-Style Doors : Did you know you can custom order ready made cabinet doors from Home Depot? Well you can, and this is a great option if you want to make the project even more beginner friendly or if you don’t have or want to use a router. But if you want to make your own from scratch, don’t worry! I’ll explain exactly how to do that later!
Tools:
- Circular Saw or Table Saw: These are the two main power tools I used to cut the plywood and pine to size. If you don’t have a table saw, a circular saw will work just fine, but just make sure you use a square guide to ensure you make super straight cuts.
- Drill with a Driver Bit: This is essential for drilling pilot holes for screws and attaching the face frames to the cabinet boxes.
- Clamps: I used these clamps throughout the project to hold pieces in place while I drilled or glued them together.
- Jigs: I used a few beginner friendly jigs— This one attaches to my circular saw to make the big cuts for the cabinet boxes and this one is used to assemble all of the cabinet boxes as well as attaching the face frames to the cabinet boxes if you would rather not use the brad nailer for that.
- ( *Optional ) Router and Router Table : I used a router to create the shaker-style design on the doors. You could also just use your table saw instead of a router if you don’t own one. But again, if you don’t have a router, or don’t want to mess around with making your own doors, you can skip this step and order custom doors from Home Depot.
Step 1: Cutting the Cabinet Boxes
First you will need to cut the 3/4″ birch plywood to size for the cabinet boxes. For the organizer, I basically needed four types of pieces: the sides, the top, the bottom, and the back.
Here’s my go-to process for making cuts like this. I just keep repeating it over and over until I have all the cuts I need!
Measure and Mark:
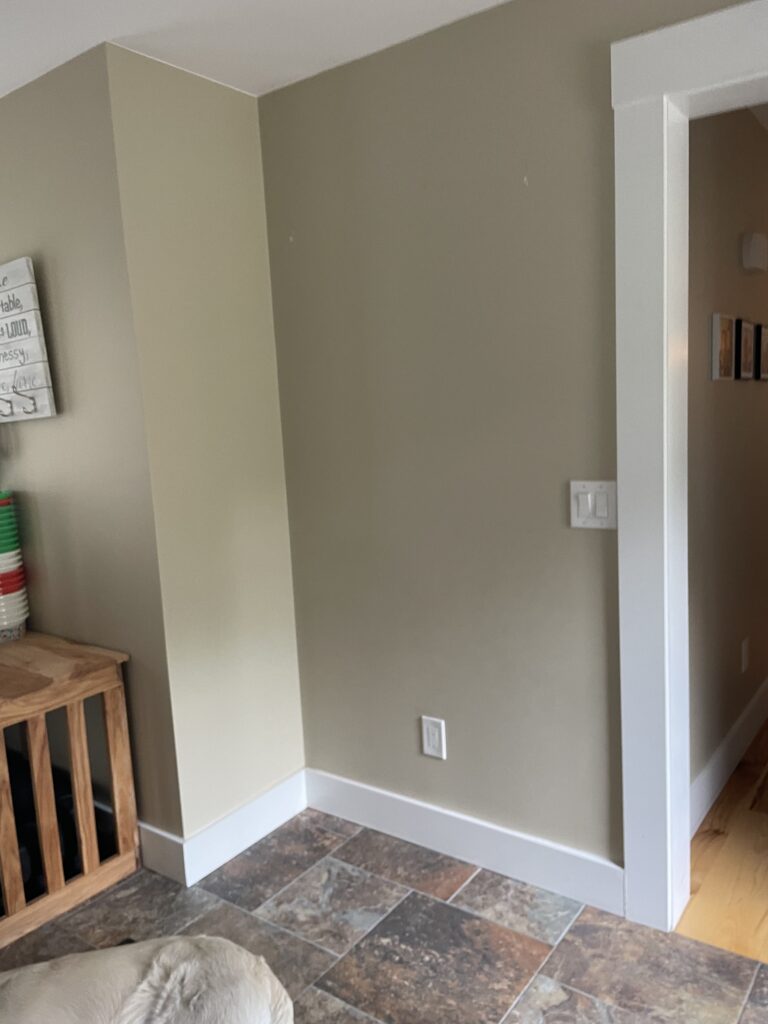
For this project , I started by measuring the space where I wanted the mudroom cabinet to go. Then I transferred these measurements onto my plywood, making sure to account for the depth, height, and width of the cabinet.
Cut the Pieces:
Using my circular saw (with this jig as a guide), I cut the plywood into the four different types of pieces I needed. ( again those pieces were; the sides, the top, the bottom and the back ) Make sure you label what cabinet each piece is for!
Dry Fit:
Before gluing or screwing anything together, I ALWAYS dry-fit all of the pieces to make sure everything lined up properly and all of my measurements are correct. This step always saves me so much time later because I can catch mistakes before they ever get screwed in permanently and have to be ripped back out and cut again.
Step 2: Assembling the Mudroom Cabinet Boxes
Once all of my pieces were cut, I moved on to assembling the cabinet boxes. I used wood glue and pocket hole screws to attach the sides to the top and bottom, making sure everything was square. I hid all of my pocket holes on the outside of the top and bottom pieces so you’ll never see ‘em.
Here’s how I assembled the boxes:
Drill Pocket Holes:
Using this jig, I marked each piece where I planned to place my pocket holes and started drilling until everything I marked was done.
Apply Wood Glue:
Once my pocket holes were all drilled, I applied wood glue to the edges of the top and bottom panels where they would meet the side pieces, using clamps to hold the pieces together while the glue dried. This helped prevent any shifting during assembly.
Attach the Back Panel:
After the main box was assembled, I attached the back panel using more wood glue and screws. This gave the cabinet extra stability and helped square up the frame. Looking back now, I could have saved money by just making a few stretcher pieces out of ¾ plywood and in-setting them on the back of the cabinets to leave ¼” spacing. Then attach ¼” plywood to the stretcher pieces. The ¼” plywood would still close in the back of the cabinet and the stretcher pieces would still give me somewhere to mount the cabinets into the studs of the wall.
Step 3: Building the Face Frames
The next step was to build the face frames for the cabinet. I used 1×2 and 1×3 select pine for this, which I cut to size with my miter saw. My plans will show you exactly where I used each size.
Cut the Frame Pieces:
I began by cutting the 1×2 and 1×3 pine pieces for the face frames with my miter saw. If you don’t have a miter saw or prefer to use a table saw you can just use a crosscut sled instead.
Assemble the Frame:
Once all the pieces were cut, I drilled pocket holes on the back of the face frame pieces and used this to hold the pieces flush then attached them all with wood glue and pocket screws.
Attach the Frame to the Cabinet Boxes:
After the face frame was ready to go, I attached it to the cabinet boxes by drilling pocket holes down the sides of the cabinets and screwing them directly into the face frame with pocket hole screws and wood glue. The face frame should always hang over each side of the cabinet box equally.
HOT TIP: You can totally skip assembling the frame with pocket holes before attaching it to the cabinet boxes if ya want. Go straight to attaching each individual face frame piece to the cabinet box.
Just keep in mind that things don’t always line up perfectly so attaching each piece individually may make it so the face frame doesn’t sit flush all the way around. Personally, I mess up enough as it is so I just take the extra time and pocket hole those thangs because I don’t need another reason to go to bed crying at night knowing I have to rip the entire thing apart and start over in the morning.
Step 4: Building the drawer
I build the drawer for the bench cabinet the same way I build the cabinet boxes because after all… it really is just another box. I also just went with these simple drawer slides because they are way more friendly on the wallet than these ones. Oh ya, they are WAY easier to install than the others too. Ask me how I know….
Step 5: Creating the Shaker-Style Doors For Your Mudroom Cabinet (Optional)
Like I mentioned early on… there are two different ways you can go about getting your custom cabinet doors. If you don’t have a router or don’t want to use one, you can order cabinet doors custom to size from Home Depot.
But if you want to DIY them, you will need a router and router table or you can run the pieces down the table saw 9475 times. The choice is yours, my friend. (I did it this way before I owned a router and it honestly isn’t bad. I don’t suggest you go buying a router if you don’t think you’ll be making doors often. 😉 Save yo pennies.
Prepare the Door Panels:
First, I cut the door panels to size using my circular saw and kreg jig. This jig honestly just makes life so much easier when you are DIYing on your own. If you’re anything like me and have a “don’t need no help” attitude, just buy this and thank me later. It’s so much easier to use this than it is to shove giant 4x sheets of plywood down the table saw on your own. Each door panel was made from 1/4″ plywood.
Routing the Edges:
I set up my router with a rail-and-stile bit and ran the select pine I was using for the frame of the doors through the router table. This gave the panels the signature raised edge that defines shaker doors.
Assemble the Doors:
After routing the edges, I attached the panels to the stiles and rails of the door frame using wood glue.
HOT TIP: I recently learned that you don’t need to glue EVERYTHING together for the door. You are technically only supposed to glue the rails (top and bottom pieces) to the stiles (side pieces).
I know, I know you’re probably over whelmed and ready to just swipe right out out of this and give up. Listen to me – you don’t have to go with shaker style… If this isn’t your style or you simply don’t have the skill to make these yet or even the money to custom order them, just use ¾ plywood and have flat panel doors. You can buy this to cover up the sides of the plywood so the layers don’t show through your paint. If I can build this – I promise you… you can too.
Step 6: Finishing Touches
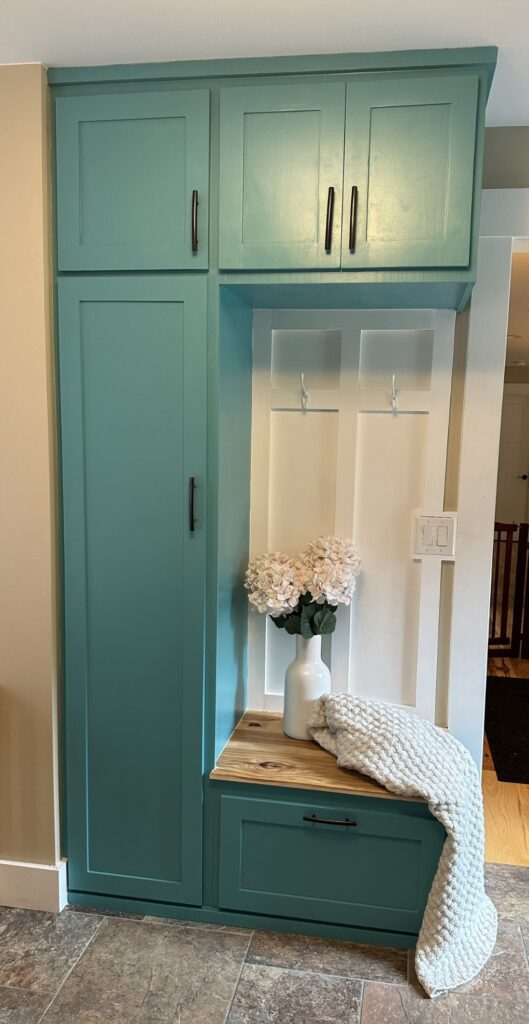
I got everything assembled and it was really starting to look like mudroom cabinets! So I moved on to the finishing touches:
Sanding:
I used a random orbit sander (use code ‘ builtbylex ‘ for a discount! ) to smooth out the surface of the plywood and the face frame. Always start with a lower grit and work your way up. Lower grits are rougher, higher grits are more fine and smooth. Plywood is always pretty smooth so I typically just start with 120 then do 180 and finish with 220. You’ll wanna grab this for a project like this.
Painting/Staining:
I applied a coat of my favorite primer to the entire cabinet, followed by the color I can’t seem to stop getting comments about… Pacific Ocean Blue by Benjamin Moore. I used a high-quality brush and this foam roller. Make sure each coat dries completely before applying the next one.
Installing Hardware:
Once the paint was dry, I attached the shaker-style doors to the cabinet boxes using hinges and installed the cabinet knobs!
HOT TIP: Tint yo primahhhh. I know, you’re like what are you talking about girlfriend?
I mean it. Tint. Your. Primer. Take the color you’ll be finishing the build off with and add a blob of it to the primer and mix ‘er up. This is going to make it so you won’t have to apply so many coats of paint.
Step 7: Mudroom Cabinet Final Assembly and Placement
Secure Face Frames:
The last step was to actually secure each cabinet to each other through the face frames using these. I then added ¼ plywood to any pieces of exposed cabinetry where you could see the pocket holes. Make sure you remove any baseboard that’s in the way before installing – you’ll need it to sit flush to the wall so you can secure all of the cabinets to the studs of the wall.
Secure the cabinets together through the face frames first and secure them to the wall AFTER this step. Trust me, it is so much easier this way.
Add Trim:
I also added a piece of select pine to the top and bottom to build it up to the ceiling and cover any gaps. And sorry…I can’t give you this exact measurement because everyone’s ceiling height is different. But I suggest just buying a bigger piece of select pine and ripping it down the table saw at the end to your custom measurement.
Fill Nail Holes and Caulk:
Next you’ll want to fill in any holes left from your finish work with the brad nailer using this. It’s my favorite filler because it dries white when its ready to be cleaned up. Don’t bother sanding this when it dries.. Just use a baby wipe. Yes – you heard that right. A baby wipe will literally just wipe the over fill away. No with the brad nailer and caulk all the seams.
Paint:
Now all that is left is caulking and painting!! Almost there!
Why did I paint twice? Well… for one, this was all built in my home and then brought to the clients house and installed.
It is MUCH easier to paint a majority of it before installation. You have far less things to work around and it severely cuts back on the time you spend doing it. It goes much faster just assembling and installing everything and only having to paint trim pieces and a few pieces of plywood that cover up certain areas.
This project honestly didn’t require advanced woodworking skills. Using basic tools like a circular saw, drill, and router was really all it took to create a functional, beautiful storage cabinet.
So if you’re a beginner, please don’t be intimidated by this project—just follow my plans and I have full confidence that you can do it! And if you have ANY additional questions at all, you can always drop them in the comments below!
Oh right! … The thing that really irks me about this one… it’s not in my house. I simply don’t have the room to build anything this beautiful here either! Talk about a serious heart break…
DIY
Storage
DIY


binge the favorites
SHOP ALL FAVORITES →
Could Not Function Without This Digital Lifesaver...
Literally Would Live in a Pigsty Without This ...
I Wear These
( Almost ) Every Day...
sanity savers
Follow AlonG ↓
I’m all about keeping it real with my hair a glorious mess, rocking my favorite sweats, and ready to share it all...
the good, the challenging, and the downright ridiculous.

Leave a Reply